Showing posts with label almond. Show all posts

Sunday, September 25, 2016

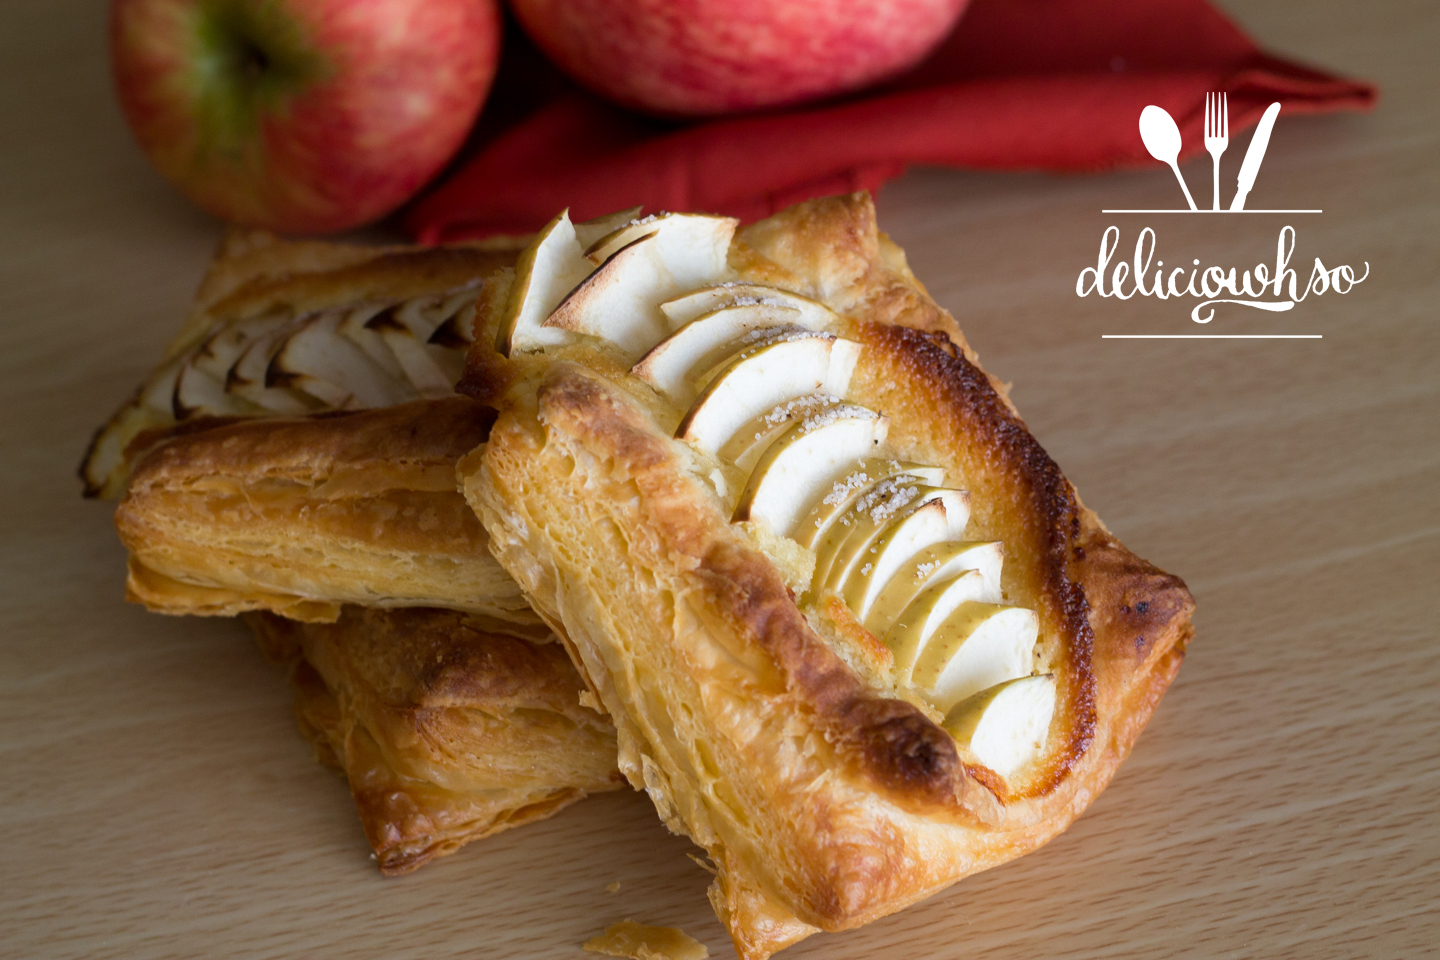
Apple Picking and Puff Pastry


Fall is officially upon us, although this week was still brutally hot in Georgia. Despite the hot weather, some friends and I went to a local orchard to go apple picking! We went to an orchard that had a lot of different apples to choose from and pick. The orchard we went to also had cow milking and pig racing! Both of them were pretty anticlimactic... Nonetheless we had a great time!


My favorite part of the day was a little stop we made on the way back.  On the way to the orchard, we saw a huge field of sunflowers from the road. We decided to take a quick adventure on the way back to Atlanta. The field had over 90,000 sunflowers, and lots of bees and butterflies to support! I'd say the only negative was when I stepped in an ant pile (ouch!). The orchard was about an hour and a half from the city, so we definitely made the most of the trip there!


We picked a total of 62 apples, and split it up between 8 of us. I don't usually eat apples, but the season calls for lots of apple desserts. I put together a quick cobbler and a pie, but I really wanted to make a flaky pastry with some of my apples.


I haven't made puff pastry since culinary school. It was only once before, and I understand why I haven't tried to make it again. It's a time consuming dough, but the finished product is well worth it! Laminated dough is something really special- every layer you make ends up in the finished product, creating the most wonderful texture. On top of that, the dough itself is not sweet.


Apple Puff Pastry (makes 12)

Dough
8 oz Flour
2.7 oz Water
2 oz Butter, Softened
Pinch Salt
1/3 of an Egg (mix it, then add only a third)
1 oz White Wine 

8 oz Plugra Butter, for Butter Block

1. Place the water, egg, wine, butter into a mixing bowl for a standing mixer. Then add the dry ingredients into the bowl. Use a dough hook attachment to mix the dough well.
2. Once the dough has started to gather and pulls away from the sides, turn on a timer and continue to mix on low speed for 6 minutes.
3. After 6 minutes, shape the dough into a square shape, wrap the dough, and put it into the fridge to rest.
4. Make a butter envelope by folding a piece of parchment paper to 7 inches x7 inches. You should be able to make an envelope shape. This is done by folding the parchment in half, short end to short end. Then, fold the sides in toward the center, so that the area inside of the fold is 7 inches. Then, fold the top portion of the parchment down, so that the square is complete.
5. Place the plugra butter block into the envelope. Use your rolling pin to roll the butter into the shape of the square. Make sure it's evenly rolled out. Place in the fridge to harden.
6. Once the dough and butter are at a similar consistency, pull them both out. They should both be firm but not hard.
7. On a floured surface, roll out the dough to a 10 inch x 10 inch square. Place the butter block on the dough, so that it sits as a diamond within the square. Bring the corners of the dough together to cover the butter. Do not overlap the dough corners.
8. Roll out the dough to a long rectangle. This is the portion of the dough where you make multiple folds to create layers of butter and dough. The first fold should be a 3-fold. Fold one side in, and the other side over, so that it is like a letter. Wrap and rest in the fridge for 15 minutes.
9. Roll out the dough in the opposite direction of the last fold. If the fold finished on the side, you should rotate the dough 90 degrees, so that the fold would finish on top or bottom. Roll out the dough to a long rectangle again. Fold the right side about 1/4 of the way inward. Then, fold the other side to meet the first flap. Then, fold the dough in half. Wrap the dough and rest in the fridge for 15 minutes.
10. Remove the dough from the fridge and repeat steps 8 and 9, so that you have performed a 3 fold, a 4 fold, a 3 fold, and another 4 fold.
11. Place the dough back into the fridge to rest until you are ready to assemble.

Frangipane (Almond Cream)
.5 stick Butter
2 oz Sugar
1.5 oz Almond Flour
1 egg
.5 oz Flour
.5 tsp Vanilla


1. Cream butter, sugar, and almond flour together in a bowl.
2. Add egg and vanilla.
3. Scrape the bowl to make sure that the ingredients are well incorporated.
4. Add flour and mix until incorporated.
Assembly
Final puff pastry dough
Frangipane
2 Apples
2 tbsp Sugar
Pinch Clove
Pinch Cinnamon
Pinch Ground Ginger

1. Roll out the puff pastry to about 1/8 inch thick. You can leave it a tiny bit thicker, but you want it to be less than 1/4 inch.
2. Preheat oven to 400 degrees F
3. Cut the rolled dough to 3.5 x 3.5 inch squares.
4. Place squares onto a flat, parchment lined sheet pan. There should be some space in between each.
5. Pipe frangipane into the center third of the pastry. This should be a layer that is not too thin or too thick. I look for something about 1/2 an inch thick.
6. Slice your apple into 1/4ths. Then slice out the core by make a diagonal cut. Cut the apple piece in half.
7. Taking the 1/8th of the apple, lay it on its side, so that the flesh faces away from you. Use your knife to slice about 1/8 inch pieces. You can discard the end pieces.
8. Arrange the sliced apples on top of the frangipane.
8. Sprinkle a small amount of the sugar and spice mixture over the top. 
9. Bake the pastry for about 20-25 minutes, until golden brown. 


Once the apple pastries come out, they are flaky and tasty. The apples have a great natural sweetness that pairs perfectly with the almond cream and nutty pastry. If you're eating this after a day or multiple, be sure that you put it into the toaster oven for a short time. This will allow the pastry to recrisp. If you are short on time, you can also recreate this using store bought puff pastry.


I'm not the biggest dessert person, but I am a total sucker for french pastry. I love that it isn't too sweet, but still has a lot of integrity. French pastry is completely classic, elegant, beautiful, and tasty! It is a little bit time consuming, but definitely worth the effort.

Sunday, December 6, 2015

Apple Galette


Fall seems to be the perfect season for anything apple. Who doesn't crave a warm slice of apple pie with a scoop of smooth ice cream? Galettes are beautiful pastries that are kind of a cross between a pie and a tart. It's great because you don't need a pie pan or tart shell to make it! The free form crust is a simple, elegant finish to a lovely seasonal dessert.


Apple roses seem to be all the rage lately. They are so beautiful with an understated elegance. It's the perfect way to finish any apple dessert. The key to creating something with a slight delicacy is to have the apples shaved thin. I used a mandolin to shave my apples, and it allowed me to be able to form the flowers without breakage. It requires some additional patience, but it is well worth it.

Apple Galette
Crust
9 oz Flour
1.5 stick Butter
.5 tsp Salt
3 oz Cold Water

1. Cut the cold butter into small cubes (1cm x 1cm).
2. Put the pieces into the flour and salt. Make sure each cube is coated.
3. Press the butter to flat pieces.
4. Rub the butter between your fingers to make flakes. Continue until the butter chunks are about the size of a lima bean.
5. Create a well in the center of the flour and pour your cold water into it.
6. Bring your flour towards the center of the well a little bit at a time, until it is completely incorporated.
7. Flatten your dough slightly and wrap it in plastic. Place in the fridge for about 30 minutes to 1 hour, until it is chilled.

Frangipane (Almond Cream)
.5 stick Butter
2 oz Sugar
1.5 oz Almond Flour
1 egg
.5 oz Flour
.5 tsp Vanilla

1. Cream butter, sugar, and almond flour together in a bowl.
2. Add egg and vanilla.
3. Scrape the bowl to make sure that the ingredients are well incorporated.
4. Add flour and mix until incorporated.

Assembly
3 Medium Apples
3 tbsp Sugar
.5 tsp Cinnamon
.25 tsp Nutmeg
.25 tsp Ginger
1 Egg

1. Preheat oven to 350 degrees F.
2. Roll the pie dough into a circle, about 1/4 inch thick all the way through. Transfer to a sheet of parchment.
3. Use a spatula or spoon to spread the frangipane in the center, moving outward. Leave about 1.5 inches of space around the edges, so that you can close your pie.
4. Shave your apples using a mandolin. You should cut your apples into quarters, slice out the core, and then shave them carefully with the skin on.
5. Once the apples are shaved, arrange them over the top of the frangipane. I like to start from the center and move outward.
6. Once the apples are arranged, bring up the edges and fold gently to keep the round shape.
7. Gently whisk the egg and use a brush to egg wash the exposed dough.
8. Mix the sugar and spices in a small bowl and sprinkle it over the apples and onto the crust.
9. Bake for about 1.5 hours or until the crust is golden brown.


I like to bake my galette in a cast iron skillet. It heats very well and evenly, and it's just nice and homey. If you don't have a cast iron large enough, you can bake it on a cookie sheet. This tart is beautiful, and tastes as good as it looks! I took it to a potluck, and it was a huge hit!

Sunday, November 9, 2014

Almond Breaded Chicken


Making healthy choices often seems like a difficult feat, but it's often not as difficult as it may seem. Many are wary of choosing healthier options because they feel as if they may have to sacrifice flavor. But fret not! You can very easily and quickly make delicious, healthy meals at home. Grilled chicken breast is not the only way to have your chicken!

This recipe is great for many dietary restrictions. It is a gluten-free option, and gives depth to your plain chicken, while adding healthy fat! Almonds are a great source of protein and antioxidants, as well as a healthy source of fat. Pan-frying gives the breading (even though it isn't bread) a crispy finish, without soaking the chicken in tons of unhealthy oil.


Almond Breaded Chicken (Makes 4 Servings)
4 Chicken Tenderloin
1/2 cup Almond Flour
1 Egg
1/2 tsp Salt
1/4 tsp Pepper
1/2 tsp Garlic Powder
2 tbsp Oil

1. Season chicken tenders. You will probably have to split the listed amounts between the chicken and the almond flour, so reserve seasoning for the flour.
2. In a shallow bowl, add the egg and whisk so that the white and yolk are equally dispersed.
3. Place the almond flour into a shallow bowl and season. Mix to incorporate seasoning well and eliminate clumps.
4. Dip the chicken into egg to coat, and then coat it with the almond flour. Repeat for all 4 strips.
5. Preheat oven to 250 degrees F. Prepare an aluminum foil lined pan.
6. In a medium sized pan, heat oil thoroughly on high heat.
7. Once the pan and the oil are hot, add the strips.
8. Allow the chicken to cook for about 30 seconds to a minute on each side, or until they are slightly golden.
9. Then, reduce the heat to low to cook for another minute on each side.
10. Remove the chicken for the pan and finish in the oven for about 5 minutes.
11. Allow the chicken to rest for a couple of minutes before slicing.
12. Slice and serve immediately

This chicken goes well with salads, pasta, sandwiches, pretty much anything. It's got a very simple finish with a versatile flavor. It's a great meal option, snack option, or anytime option! Dip in a sauce, cut it up on a pizza; there's so many creative ways to use it for a healthy, flavorful alternative! Feel free to share how you may have used this recipe in the comments!


Sunday, July 20, 2014

Nectarine Mint Macarons

Earlier today, I catered a bloggers brunch for Lululemon! It was a great experience, and I'll be posting more from it next week! One of the dessert items I made for the brunch was this macaron! It's a refreshing macaron with a mint white chocolate ganache and a tangy nectarine jam! Perfect for any summer party!

Nectarine Mint Macarons (Makes about 20 Macarons)
Shells
100g Almond Flour
120 g Confectioner's Sugar
50 g Granulated Sugar
70 g Egg Whites (2 large whites)
1/2 tsp Red and Yellow Gel Food Coloring

1. Pulse almond flour and powdered sugar in a food processor until very finely ground. Be careful not to grind too long, because it will release all of the oils, ruining your final product.
2. Sift the powder with a medium-mesh sieve.
3. Place the particles that are too large to fit through the sieve back into the food processor, pulse, and sift again. Throw out the excess pieces.
4. In a grease-free bowl, place your egg whites and sugar. Allow to sit for a few minutes to begin to dissolve.
5. Use grease-free beaters on high speed to whip the egg whites to stiff peaks.
6. As the meringue reaches stiff peaks, add food coloring until you reach the desired color.
7. Use a rubber spatula to fold the dry ingredients into the meringue until the batter moves slowly, like lava. If you run your spatula through it, it should fall together after 5-7 seconds.
8. Put the mixture into a piping bag fitted with a large round tip (3/8 inch). 
9. Pipe rounds that are about an inch apart onto a nonstick baking mat (silpat) that is placed onto a cookie sheet. 
10. Do this by holding the bag straight up about half an inch above the silpat, applying pressure to the bag until about 1 inch in diameter, stopping pressure, and then removing by moving hand in a very small circular motion to release the tip from the macaron shell. Make sure there is enough space to spread.
11. Rap your cookie sheet/sheet pan on the table a few times to make sure there are no bumps on the macaron shells.
12. Let rest until dry to the touch (about 30-45 minutes, longer on rainy days).
13. Preheat oven to 300 degrees F. If you have a convection oven, use convection.
14. Bake macaron shells on the second shelf of the oven for 14-17 minutes, until they do not wiggle when nudged.
15. Remove from oven and allow shells to cool completely before removing from the silpat.


Whipped Mint Ganache
6 oz White Chocolate
3 oz Heavy Cream
3 Mint Leaves

1. In a small pot, scald cream.
2. Place white chocolate in a bowl, and pour the hot cream over the chocolate.
3. Allow it to sit slightly, and then mix to incorporate completely.
4. Finely chop the mint leaves and add to the white chocolate ganache. 
5. Allow the ganache to cool and set slightly.
6. Once the ganache is thick, use a mixer to whip to medium peaks. Pipe immediately.

Nectarine Jam
2 Nectarines
1/4 cup Sugar
1 oz Water

1. Cut nectarines into small pieces. They do not need to be exact.
2. Place into a pot with sugar and water.
3. Heat on low to medium heat and mix occasionally to avoid burning.
4. Heat until the nectarine is soft and can be crushed easily with a spoon.
5. Pour the mixture into a food processor and pulse a few times to ensure there are no large pieces.
6. Allow the mixture to cool completely before you pipe into the macaron shell. You can speed up the process in the fridge in a thin sheet.

Assembly
1. Pair the shells by size. You should have about 20 pairs of shells.
2. On the surface of the bottom of the shell, place a small pinch of jam in the center. It should be enough for a small surprise. 
3. Put the ganache into a piping bag with the same tip that you used to pipe the macarons.
4. Pipe the ganache so that it is covering about 1/2 of the surface of the bottom of the shell.
5. Put the pairs together to create a "sandwich". 
6. Place in the fridge overnight to allow the flavors to develop.
7. Let the macarons come to room temperature before you serve them.

Though the thought of nectarine and mint seems a little strange, the combination is extremely refreshing and delicious! This was a huge hit at the brunch, and I'm sure it will be a hit with your friends as well! :)

Stay tuned for a full post on my first solo catering event next week!!!

Thursday, November 28, 2013

Holiday Green Beans

Green beans are great for any holiday party! Many people use canned green beans because they are cheap and easy, but when fresh green beans are in season, they're just at cheap and far more delicious... not to mention nutritious! This is a simple recipe to create an extra-ordinary green bean dish that can wow any guests! Almonds and cranberries add a great contrast in color, while the balsamic and olive oil compliment the green beans with a tartness that pleases any palate. This recipe is perfect for the Thanksgiving meal. It has an acidity that will help to balance the saltiness and richness of the Thanksgiving table. It's also quick and simple (I finished in about 15 minutes!)

Holiday Green Beans
1 lb Fresh Green Beans
1 tbsp Olive Oil 
3 cloves Garlic, Minced
1 tsp Salt
1/2 tsp Pepper
1/4 cup Cranberries (dried or fresh)
1/4 cup Slivered Almonds
1 tbsp Olive Oil
2 tbsp Balsamic Vinegar

1. Trim the ends of the green beans by breaking them off. Then, rinse the green beans.
2. Heat a medium-large pot on medium heat, and then pour in the olive oil.
3. Once hot, add garlic. Spread around the garlic, and then pour in the green beans. Be careful, they will cause the oil to splash (because of the water you rinse with).
4. When the green beans are about halfway done cooking (5 min) add the cranberries and almonds.
5. Allow to finish cooking until tender.
6. In a large bowl, mix oil and vinegar until emulsified.
7. When the green beans are finished cooking, add them to the bowl and mix until the vinaigrette covers the green beans.
8. Move to a serving platter and serve!

This recipe would be great with some crumbled goat cheese and rosemary if you want to dress it up further and impress your guests. This can be served warm or cold, too (although I prefer it warm).

I hope everyone is having a wonderful and safe Thanksgiving! Enjoy the time with family and friends and be sure to eat lots and lots! Once again, I am so thankful for everyone who has taken the time to look at the blog, like the Facebook page, share any posts, and recreate dishes! I hope you all begin to see food as an experience and a story as I am sharing mine with you! Happy Thanksgiving everyone :)

Monday, November 11, 2013

Pepero Day

11/11 is a Korean "holiday" called Pepero (빼빼로) Day! This is because the numbers look like Pepero sticks (kind of). The day is similar to Valentines Day. People give Pepero to their friends and loved ones. Here's pictures of the ones I made with my friend, Nate!


We used Italian breadsticks/crackers and coated them in melted chocolate. We put a variety of toppings for lots of yummy flavors! Try them for yourself!

 Semisweet chocolate: (from left to right) orange peel/lemon peel, toasted coconut, sprinkle, "hot" chocolate, toasted almond

 White chocolate: Coconut, toasted almond, green tea (matcha), orange peel/lemon peel


Thanks for reading! Have a wonderful Pepero Day!