Showing posts with label dessert. Show all posts
Sunday, November 13, 2016
S'mores Bread Pudding
Fall has me thinking about warm desserts to welcome the colder weather. Usually, when I think desserts, I'm thinking something cold or room temp, whether it's pies, tarts, cake, ice cream, or custard. Nonetheless, there is little better than a warm bread pudding to lift your spirits.
Smoky marshmallow, melted chocolate, and soft bread and graham crackers make this a fun treat. I love it best served with ice cream when it's fresh out of the oven.
S'mores Bread Pudding
Bread (Enough to fill a 9 x 13 inch casserole dish most of the way)
1 cup Milk
1 cup Heavy Cream
9 Eggs
1 tsp Vanilla Extract
1/4 cup Sugar
1/4 cup Brown Sugar
1/2 cup Chocolate Chips
1/2 cup Graham Crackers, crushed
1/2 cup Mini Marshmallows
1. Preheat oven to 350 degrees F. Slice bread to 1 inch by 1 inch cubes.
2. In a medium pot, boil heavy cream and milk. In the meantime, whisk eggs, vanilla, brown sugar, and sugar in a large bowl.
3. Once the cream comes to a boil, pour the mixture slowly into the eggs, whisking the entire time.
4. Allow the mix to cool slightly. Then, add the bread into the bowl and toss very gently, so that the bread can keep its shape.
5. Then, add graham crackers, marshmallows and chocolate chips. Reserve about a handful of each to garnish the bread pudding as a topping.
6. Pour the bread pudding mixture into a cast iron pan, casserole dish, or any other oven-safe vessel. Then, garnish with the remaining chocolate chips, crushed graham cracker, and marshmallows.
7. Place the bread pudding in the oven for about 30 minutes, or until set. The bread pudding will puff up some. If the marshmallows begin to get golden, cover the vessel with foil until it's cooked through.
8. Once the bread pudding is set, and there is no watery liquid, remove from the oven. Serve as quickly as possible.
I think early fall/late summer means fire pits. Whether it's camping or other get togethers around a fire pit, where there is fire, there are s'mores. Also, since the Christmas season is coming up, there will be even more marshmallows to roast! This is a great way to utilize the leftover s'more ingredients, and would be a perfect addition to your Thanksgiving or Christmas spread!
Sunday, September 25, 2016
Apple Picking and Puff Pastry
Fall is officially upon us, although this week was still brutally hot in Georgia. Despite the hot weather, some friends and I went to a local orchard to go apple picking! We went to an orchard that had a lot of different apples to choose from and pick. The orchard we went to also had cow milking and pig racing! Both of them were pretty anticlimactic... Nonetheless we had a great time!
My favorite part of the day was a little stop we made on the way back. On the way to the orchard, we saw a huge field of sunflowers from the road. We decided to take a quick adventure on the way back to Atlanta. The field had over 90,000 sunflowers, and lots of bees and butterflies to support! I'd say the only negative was when I stepped in an ant pile (ouch!). The orchard was about an hour and a half from the city, so we definitely made the most of the trip there!
We picked a total of 62 apples, and split it up between 8 of us. I don't usually eat apples, but the season calls for lots of apple desserts. I put together a quick cobbler and a pie, but I really wanted to make a flaky pastry with some of my apples.
I haven't made puff pastry since culinary school. It was only once before, and I understand why I haven't tried to make it again. It's a time consuming dough, but the finished product is well worth it! Laminated dough is something really special- every layer you make ends up in the finished product, creating the most wonderful texture. On top of that, the dough itself is not sweet.
Apple Puff Pastry (makes 12)
Dough
8 oz Flour
2.7 oz Water
2 oz Butter, Softened
Pinch Salt
1/3 of an Egg (mix it, then add only a third)
1 oz White Wine
8 oz Plugra Butter, for Butter Block
1. Place the water, egg, wine, butter into a mixing bowl for a standing mixer. Then add the dry ingredients into the bowl. Use a dough hook attachment to mix the dough well.
2. Once the dough has started to gather and pulls away from the sides, turn on a timer and continue to mix on low speed for 6 minutes.
3. After 6 minutes, shape the dough into a square shape, wrap the dough, and put it into the fridge to rest.
4. Make a butter envelope by folding a piece of parchment paper to 7 inches x7 inches. You should be able to make an envelope shape. This is done by folding the parchment in half, short end to short end. Then, fold the sides in toward the center, so that the area inside of the fold is 7 inches. Then, fold the top portion of the parchment down, so that the square is complete.
5. Place the plugra butter block into the envelope. Use your rolling pin to roll the butter into the shape of the square. Make sure it's evenly rolled out. Place in the fridge to harden.
6. Once the dough and butter are at a similar consistency, pull them both out. They should both be firm but not hard.
7. On a floured surface, roll out the dough to a 10 inch x 10 inch square. Place the butter block on the dough, so that it sits as a diamond within the square. Bring the corners of the dough together to cover the butter. Do not overlap the dough corners.
8. Roll out the dough to a long rectangle. This is the portion of the dough where you make multiple folds to create layers of butter and dough. The first fold should be a 3-fold. Fold one side in, and the other side over, so that it is like a letter. Wrap and rest in the fridge for 15 minutes.
9. Roll out the dough in the opposite direction of the last fold. If the fold finished on the side, you should rotate the dough 90 degrees, so that the fold would finish on top or bottom. Roll out the dough to a long rectangle again. Fold the right side about 1/4 of the way inward. Then, fold the other side to meet the first flap. Then, fold the dough in half. Wrap the dough and rest in the fridge for 15 minutes.
10. Remove the dough from the fridge and repeat steps 8 and 9, so that you have performed a 3 fold, a 4 fold, a 3 fold, and another 4 fold.
11. Place the dough back into the fridge to rest until you are ready to assemble.
Frangipane (Almond Cream)
.5 stick Butter
2 oz Sugar
1.5 oz Almond Flour
1 egg
.5 oz Flour
.5 tsp Vanilla
1. Cream butter, sugar, and almond flour together in a bowl.
2. Add egg and vanilla.
3. Scrape the bowl to make sure that the ingredients are well incorporated.
4. Add flour and mix until incorporated.
Assembly
Final puff pastry dough
Frangipane
2 Apples
2 tbsp Sugar
Pinch Clove
Pinch Cinnamon
Pinch Ground Ginger
1. Roll out the puff pastry to about 1/8 inch thick. You can leave it a tiny bit thicker, but you want it to be less than 1/4 inch.
2. Preheat oven to 400 degrees F
3. Cut the rolled dough to 3.5 x 3.5 inch squares.
4. Place squares onto a flat, parchment lined sheet pan. There should be some space in between each.
5. Pipe frangipane into the center third of the pastry. This should be a layer that is not too thin or too thick. I look for something about 1/2 an inch thick.
6. Slice your apple into 1/4ths. Then slice out the core by make a diagonal cut. Cut the apple piece in half.
7. Taking the 1/8th of the apple, lay it on its side, so that the flesh faces away from you. Use your knife to slice about 1/8 inch pieces. You can discard the end pieces.
8. Arrange the sliced apples on top of the frangipane.
8. Sprinkle a small amount of the sugar and spice mixture over the top.
9. Bake the pastry for about 20-25 minutes, until golden brown.
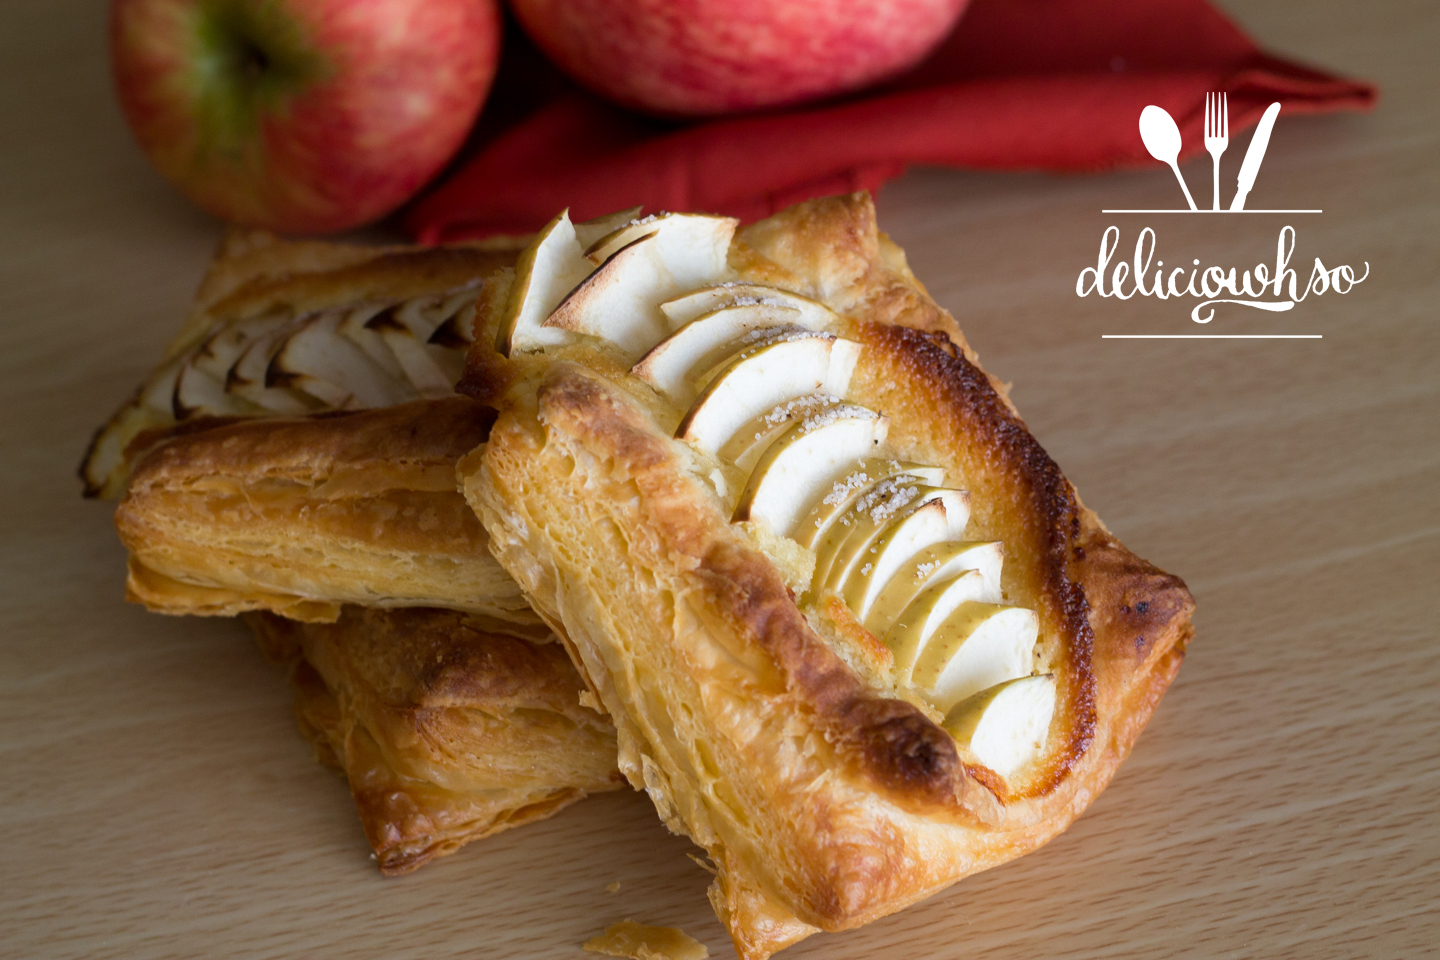
Once the apple pastries come out, they are flaky and tasty. The apples have a great natural sweetness that pairs perfectly with the almond cream and nutty pastry. If you're eating this after a day or multiple, be sure that you put it into the toaster oven for a short time. This will allow the pastry to recrisp. If you are short on time, you can also recreate this using store bought puff pastry.
I'm not the biggest dessert person, but I am a total sucker for french pastry. I love that it isn't too sweet, but still has a lot of integrity. French pastry is completely classic, elegant, beautiful, and tasty! It is a little bit time consuming, but definitely worth the effort.
Sunday, July 24, 2016
Grande Macaron (Plus a Video)
My friends, Denver and Meng Meng, started a media company called Enjoy. Denver is very active in the film world, and has worked with the production of major shows, like MasterChef Junior, as well as filming music videos! The husband and wife duo branched out to grow their personal brand, while doing what they love!
When Denver approached me about doing this video, I was nervous to say the least... He and Meng Meng were so friendly and supportive when sharing their vision and directing me through it. Nonetheless, there's a reason I stick to blogging. You can take a peek at the 30-second promo here:
For this video, I wanted to make something that is elegant and makes a statement. The grande macaron was a great way to do that! It's basically a giant macaron filled with mousse and garnished with raspberries.
Grande Macaron (makes about 3-5 macarons)
Shells
100g Almond Flour
110 g Confectioner's Sugar
15 g Cocoa Powder
50 g Granulated Sugar
70 g Egg Whites (2 large whites)
1. Pulse almond flour, cocoa powder, and powdered sugar in a food processor until very finely ground. Be careful not to grind too long, because it will release all of the oils, ruining your final product.
2. Sift the powder with a medium-mesh sieve.
3. Place the particles that are too large to fit through the sieve back into the food processor, pulse, and sift again. Throw out the excess pieces.
4. In a grease-free bowl, place your egg whites and sugar. Allow to sit for a few minutes to begin to dissolve.
5. Use grease-free beaters on high speed to whip the egg whites to stiff peaks.
6. Use a rubber spatula to fold the dry ingredients into the meringue until the batter moves slowly, like lava. If you run your spatula through it, it should fall together after 5-7 seconds.
7. Put the mixture into a piping bag fitted with a large round tip (3/8 inch).
8. Pipe rounds that are about an inch apart onto a nonstick baking mat (silpat) that is placed onto a cookie sheet.
9. Do this by holding the bag straight up about half an inch above the silpat, applying pressure to the bag until about 2-2.5 inches in diameter, stopping pressure, and then removing by moving hand in a very small circular motion to release the tip from the macaron shell. Make sure there is enough space to spread.
10. Rap your cookie sheet/sheet pan on the table a few times to make sure there are no bumps on the macaron shells.
11. Let rest until dry to the touch (about 30-45 minutes, longer on rainy days).
12. Preheat oven to 300 degrees F. If you have a convection oven, use convection.
13. Bake macaron shells on the second shelf of the oven for 20-25 minutes, until they do not wiggle when nudged.
14. Remove from oven and allow shells to cool completely before removing from the silpat.
Chocolate Mousse
3.75 oz Dark/Semi-Sweet Chocolate
4 oz Heavy Cream
.5 packet (.13 oz) Gelatin
.75 oz Water, to Bloom Gelatin
1.75 oz Sugar
.5 oz Water, to Melt Sugar
1.25 oz Egg Yolks
1 box Raspberries
1. Melt the chocolate in a heat proof bowl placed on top of a pot of boiling water (double boiler).
2. Whip the heavy cream to soft peaks and set aside.
3. In a small container, mix gelatin and water and allow to bloom.
4. Begin whipping the yolks. You are looking to aerate them to a pale yellow.
5. As the yolks begin whipping, heat the sugar and water in a pan. Allow to boil and become slightly syrupy. The bubbles will start to linger slightly, but the sugar syrup will not become very thick or change color. You will probably cook the sugar for about 1 minute to get to this point.
6. Pour the sugar syrup very slowly into the yolks as you whip them. Be careful as it is extremely hot. This is best done in a standing mixer.
7. Once the sugar is poured in, melt the gelatin mixture. Pour the melted gelatin into the yolks. Keep the yolks whipping until completely cool.
8. Once cooled, fold the yolks into the chocolate.
9. Once combined, add the cream and mix until smooth. Allow to set in the fridge until it is no longer soft, and is completely set. This could be a few hours or overnight.
Assembly
1. Pair the shells by size.
3. Put the mousse into a piping bag with the same tip that you used to pipe the macarons.
4. Pipe the mousse into the center of the macaron. You want to hold the bag about 3/4 inch to one inch above the surface. Pipe leaving plenty of room for raspberries to go around.
5. Place fresh raspberries around the mousse, allowing it to hold them in place.
6. Put the other shell onto the top to create a "sandwich".
7. Place in the fridge a few hours before to allow the flavors to develop.
The macaron definitely packs a wow factor, with great flavor. Chocolate and raspberry are the perfect pair, so I was definitely excited to try it!
If you ever have any film or photography needs, you definitely should consider Enjoy. They do corporate videos, events, weddings, and music videos. Enjoy also does social media management. I can attest to the difficulty of trying to manage social media while working full time. It's a great way to grow your audience, and can definitely benefit your site.
Be sure to check them out for all of your media needs!
Facebook: /enjoynewmedia
Instagram: @enjoynewmedia
Website: http://www.weareenjoy.com/
For this video, I wanted to make something that is elegant and makes a statement. The grande macaron was a great way to do that! It's basically a giant macaron filled with mousse and garnished with raspberries.
Grande Macaron (makes about 3-5 macarons)
Shells
100g Almond Flour
110 g Confectioner's Sugar
15 g Cocoa Powder
50 g Granulated Sugar
70 g Egg Whites (2 large whites)
1. Pulse almond flour, cocoa powder, and powdered sugar in a food processor until very finely ground. Be careful not to grind too long, because it will release all of the oils, ruining your final product.
2. Sift the powder with a medium-mesh sieve.
3. Place the particles that are too large to fit through the sieve back into the food processor, pulse, and sift again. Throw out the excess pieces.
4. In a grease-free bowl, place your egg whites and sugar. Allow to sit for a few minutes to begin to dissolve.
5. Use grease-free beaters on high speed to whip the egg whites to stiff peaks.
6. Use a rubber spatula to fold the dry ingredients into the meringue until the batter moves slowly, like lava. If you run your spatula through it, it should fall together after 5-7 seconds.
7. Put the mixture into a piping bag fitted with a large round tip (3/8 inch).
8. Pipe rounds that are about an inch apart onto a nonstick baking mat (silpat) that is placed onto a cookie sheet.
9. Do this by holding the bag straight up about half an inch above the silpat, applying pressure to the bag until about 2-2.5 inches in diameter, stopping pressure, and then removing by moving hand in a very small circular motion to release the tip from the macaron shell. Make sure there is enough space to spread.
10. Rap your cookie sheet/sheet pan on the table a few times to make sure there are no bumps on the macaron shells.
11. Let rest until dry to the touch (about 30-45 minutes, longer on rainy days).
12. Preheat oven to 300 degrees F. If you have a convection oven, use convection.
13. Bake macaron shells on the second shelf of the oven for 20-25 minutes, until they do not wiggle when nudged.
14. Remove from oven and allow shells to cool completely before removing from the silpat.
Chocolate Mousse
3.75 oz Dark/Semi-Sweet Chocolate
4 oz Heavy Cream
.5 packet (.13 oz) Gelatin
.75 oz Water, to Bloom Gelatin
1.75 oz Sugar
.5 oz Water, to Melt Sugar
1.25 oz Egg Yolks
1 box Raspberries
1. Melt the chocolate in a heat proof bowl placed on top of a pot of boiling water (double boiler).
2. Whip the heavy cream to soft peaks and set aside.
3. In a small container, mix gelatin and water and allow to bloom.
4. Begin whipping the yolks. You are looking to aerate them to a pale yellow.
5. As the yolks begin whipping, heat the sugar and water in a pan. Allow to boil and become slightly syrupy. The bubbles will start to linger slightly, but the sugar syrup will not become very thick or change color. You will probably cook the sugar for about 1 minute to get to this point.
6. Pour the sugar syrup very slowly into the yolks as you whip them. Be careful as it is extremely hot. This is best done in a standing mixer.
7. Once the sugar is poured in, melt the gelatin mixture. Pour the melted gelatin into the yolks. Keep the yolks whipping until completely cool.
8. Once cooled, fold the yolks into the chocolate.
9. Once combined, add the cream and mix until smooth. Allow to set in the fridge until it is no longer soft, and is completely set. This could be a few hours or overnight.
Assembly
1. Pair the shells by size.
3. Put the mousse into a piping bag with the same tip that you used to pipe the macarons.
4. Pipe the mousse into the center of the macaron. You want to hold the bag about 3/4 inch to one inch above the surface. Pipe leaving plenty of room for raspberries to go around.
5. Place fresh raspberries around the mousse, allowing it to hold them in place.
6. Put the other shell onto the top to create a "sandwich".
7. Place in the fridge a few hours before to allow the flavors to develop.
The macaron definitely packs a wow factor, with great flavor. Chocolate and raspberry are the perfect pair, so I was definitely excited to try it!
If you ever have any film or photography needs, you definitely should consider Enjoy. They do corporate videos, events, weddings, and music videos. Enjoy also does social media management. I can attest to the difficulty of trying to manage social media while working full time. It's a great way to grow your audience, and can definitely benefit your site.
Be sure to check them out for all of your media needs!
Facebook: /enjoynewmedia
Instagram: @enjoynewmedia
Website: http://www.weareenjoy.com/
Sunday, June 12, 2016
Appa's x Delici-owh-so
I'll be featuring a different dessert (maybe two) every week. They'll have delici-owh-so macarons and cream puffs, alternating. The flavors will be different every time, so you should come out and try them!
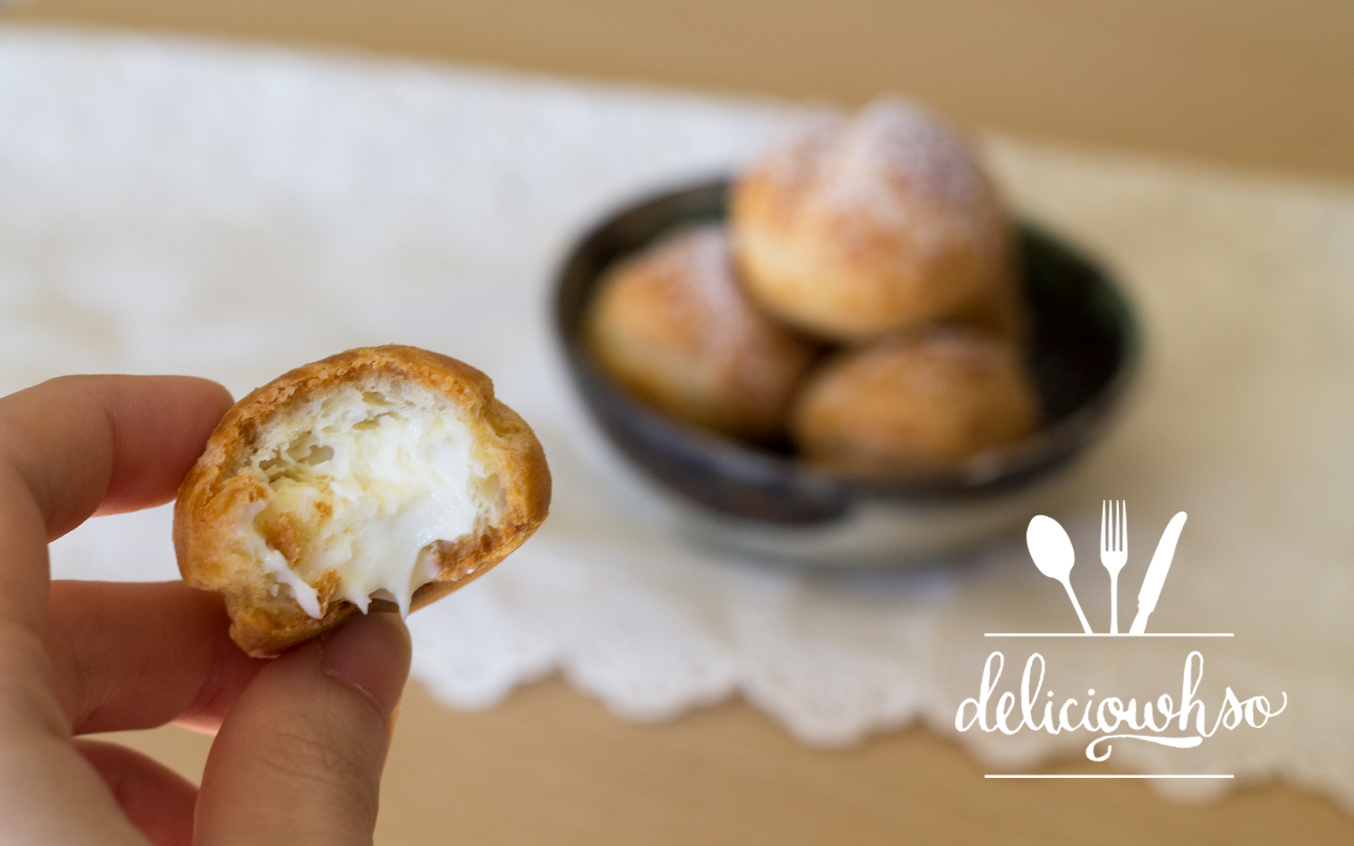
This week, I featured a green tea cream puff. They were topped with a crispy craquelin, which brought a fun texture and a sweetness that accompanies the choux pastry perfectly. They were filled with a light green tea filling that makes for a perfect ending to the sushi meal.
If you're local, this place is a MUST-TRY!!! The bowls and burritos are perfectly seasoned, and they're even better with the appa and umma sauces. Appa is spicy, and umma is sweet. It's a perfect topping for the fresh fish and crispy veggies. "Appa" is father in Korean, and "Umma" means mother. It's a cute and clever way to describe the sauces, and the flavors do not disappoint!
You can definitely tell that all of the food is made with a lot of love, effort, and passion by this one adorable family! I love that I get to take part in bringing great food to our city, and hope that everyone gets the chance to make it out! We put a lot of thought into every element of what we're sharing, and we look forward to the weeks to come! Follow @appasatl and @deliciowhso to see more updates on the featured desserts!
Sunday, May 8, 2016
Strawberry Champagne Tart
Strawberries are in season! Summertime is just about here, bringing the sweetest strawberries! Speaking of sweet- happy mother's day! I have been blessed with the sweetest mothers :) One of the memories I have is with my stepmom making fruit pizza- it's basically a bigger version of a fruit tart.
I guess you can call the fruit pizza a bit of an inspiration for this post. Fruit tarts are one of my favorite desserts, and I couldn't help but use the beautiful, ripe strawberries. The champagne cream filling is a perfect compliment, offering a creaminess with slight kick.
Strawberry Champagne Tart
For the crust
1 stick Butter
1/8 cup Sugar
1 egg yolk
1/2 cup Flour
pinch Salt
1. In a bowl, cream softened butter with sugar until light and fluffy.
2. Add the egg yolk and incorporate well.
3. Add the flour and a pinch of salt and mix until combined.
4. Pour your dough out onto a plastic wrap and allow to rest in the fridge until firm.
5. Once firm, roll out until about 1/4 inch thick.
6. Line greased tart shell with the dough, trimming the edges. Repeat if you have multiple mini shells. Poke holes with a fork to vent.
7. Preheat oven to 325 degrees F. Bake the shell until golden. Remove from the oven and cool completely.
Champagne Cream
1 cup Milk
1 tbsp Butter
1/4 cup Sugar
2 Egg Yolks
2 tbsp Corn Starch
4 oz Champagne
.5 oz Gelatin Powder
3.5 oz Water
1 Cup Heavy Cream
3/4 cup Confectioner Sugar
Strawberries
1. Put 3/4 cup of milk into a pot with the butter.
2. Add half the sugar to the milk in the pot, and the other half into a bowl with the remaining milk.
3. Add yolks and corn starch to the bowl with the 1/4 cup of milk. Whisk to make into a slurry and combine well.
4. Heat the milk in the pot until it is scalding. Pour slowly into the bowl, while whisking. Pour the mixture back into the pot.
5. Whisk the mixture on low heat until it thickens. The mixture will boil, and the starchy flavor will cook out.
6. Immediately pour the mixture into a bowl.
7. Mix water and gelatin together. Melt in a microwave with champagne.
8. Add the gelatin mix to the pastry cream. Mix until combined.
9. In a separate bowl, whip heavy cream and confectioner's sugar to soft peaks.
10. Fold the heavy cream into the pastry cream into incorporated.
11. Pipe the cream into the cooled tart shells, and top with strawberries.
This is a great, refreshing summer treat! The sweet strawberries work perfectly with the crispy crust. It's best served right away, garnished with a little mint. It's the perfect treat for any occasion :)
Sunday, May 1, 2016
Earl Grey Creme Brulee
Creme brulee seems to be the epitome of fine dining. I think the smooth custard paired with the crisp finish intimidates home cooks. One thing I learned about creme brulee is that it's actually not a difficult thing to make at home. It's a simple process, though it takes a little bit of time.
I love to infuse my brulee with earl grey tea. It adds a complexity that helps to keep the rich custard from overwhelming. It's a smooth, smoky dessert. The only thing you really need to make it is a torch.
Earl Grey Creme Brulee (Makes 1 dozen)
16 oz heavy cream
125 g egg yolks
150 g Sugar
1 bag of earl grey tea
Sugar, to torch
1. Preheat oven to 200 degrees F.
2. Heat heavy cream. Add the contents of the tea bag to the cream.
3. In a medium bowl, mix yolks and sugar together.
4. Once the cream comes to a boil, remove it from the heat and allow it to steep for about 5 mintues.
5. Pour it into the yolks through a fine strainer to strain out the tea leaves. Mix as you pour to keep from curdling the yolks.
6. Place a flexible muffin tin (silicone) onto a shallow sheet pan,.
7. Pour the mixture evenly into the silicone muffin molds. Then, place the sheet into the oven. Pour water into the sheet pan about halfway up.
8. Bake for about an hour and a half, until the centers are not loose anymore. It should have a very slight jiggle. You can turn off the oven and leave the door open when it is finished. This will vary based on your oven and mold.
9. Remove from the oven when finished and allow to cool. Be very very careful as the water will be hot.
10. Once room temperature, place the sheet into the freezer to solidify the creme brulee.
11. Once solid, unmold the frozen creme brulee. Dip the tops (small side) in sugar and torch until golden.
12. Serve soon after you brulee it. You should allow it to thaw slightly before serving.
If you don't have a flexible muffin mold, you can also use a regular muffin tin. After freezing the brulee, you will need to torch the bottoms (the metal) and cut around it with a knife. It's a little messier, but it's definitely do-able. You torch the tin gently so that you melt the bottom of the custard slightly, so that it releases from the tin.
Sunday, March 27, 2016
Profiteroles (Choux Cream)
Happy Easter! I hope that everyone was able to celebrate and enjoy the day. This was my first Easter in a couple years that I wasn't working, which seemed strange. When I was working at the hotel, I worked Easter brunch, so I'd be there from about 5 or 6 am to set up until close to the end of brunch. After brunch I would head to church (back when my church had service at 4pm). Needless to say, Easter Sunday was always a long day, but it was always so rewarding and refreshing.
Thinking about Easter brunch at the hotel reminds me of all the desserts that I used to help put out with the rest of the team. I personally don't have the biggest sweet tooth, which is why I love choux so much! This french pastry is not very sweet, but pairs excellently with creamy fillings. You see it used for cream puffs/profiteroles and eclairs.
I paired this choux with a mascarpone filling. It's great with the choux, since it's smooth, creamy, and light. If you're a fan of chocolate or coffee, you could make a cocoa glaze to top it.
Choux Pastry (makes 50 small pieces)
250g Milk
150g Water
185g Butter
8g Sugar
8g Salt
220g Cake Flour
400g Eggs
1. Bring milk, water, and butter to a boil in a large pot.
2. Reduce heat to low. Add flour, sugar, and salt all at once.
3. Mix the batter thoroughly until it combines into one mass.
4. Move the batter into a bowl and use a mixer to mix on low speed to cool off gently.
5. Crack the eggs into a container.
6. Pour the eggs slowly, about 2 at a time while mixing on low speed. Scrape the bowl between pours to ensure a smooth batter.
7. Place the finished batter into a piping bag fitted with a round tip. Pipe small rounds, about 1-1.5 inches in diameter onto a silpat.
8. Preheat the oven to 375 degrees F.
9. Spray the piped out choux lightly with baking spray. Bake in the oven until golden brown, around 18 minutes, rotating halfway through.
10. Remove the choux from the oven and allow to cool. Once cool, use a small knife or a sharp piping tip to poke a hole at the bottom of the pastry.
Mascarpone Cream
1 cup Milk
1 oz Butter
1.25 oz Flour
3 oz Sugar
1.5 oz Egg Yolks
.3 oz Gelatin
1.8 oz Water
8 oz Mascarpone Cheese
2.5 oz Powdered Sugar
1/2 tsp Vanilla Extract
1. Bring milk and butter to a boil.
2. In the meantime, whisk together flour and sugar in a bowl, and add the egg yolks.
3. Pour the milk into the egg mixture slowly, whisking constantly, then pour everything back into the pot. Turn your heat to low.
4. Whisk the mixture constantly and allow it to boil and thicken.
5. Pour the mixture through a strainer into a bowl.
6. Bloom gelatin in water, and melt. Pour it into the pastry cream mixture and let it cool slightly.
7. Put mascarpone and powdered sugar into the pastry cream and fold thoroughly. Add vanilla for flavor.
8. Place the filling into a piping bag fitted with a small round tip.
9. Pipe the filling into the choux pastry and serve. You can freeze or refrigerate these pastries as well, but they taste best freshly served.
Choux pastry is one of my favorites! I love that it's not very sweet, but adds the perfect balance of flavor with a smooth filling. The other thing I like about choux is that you can fill it with whatever filling that you want to.
Sunday, March 13, 2016
Coconut Cream Tart
3.14 is tomorrow! Pi day! Last year, I made a couple plum hand pies. This year, I shifted to a more modern version of a classic pie. I always remember cherishing pi day during elementary, middle, and high school. It's a math holiday that lets you bring pies to school and eat them during class. Sadly, in the working world, I don't get pi days... Still, it was always one of my favorite times of the year!
I love pies, but I can't help but want something more elegant from time to time. This is an easy way to make your "pie" look like something more upscale, without sacrificing flavor, texture, or too much time. It's definitely a great way to impress your guests! Plus, this is a great way to allow each guest to have an individual piece(s).
Coconut Cream Tart
For the shell/crust
1 stick Butter
1/8 cup Sugar
1 egg yolk
1/2 cup Flour
pinch Salt
1. In a bowl, cream softened butter with sugar until light and fluffy.
2. Add the egg yolk and incorporate well.
3. Add the flour and a pinch of salt and mix until combined.
4. Pour your dough out onto a plastic wrap and allow to rest in the fridge until firm.
5. Once firm, roll out until about 1/4 inch thick. Then, cut desired shapes using a sharp knife or cutters.
6. Place onto a parchment lined sheet pan, and then freeze until solid.
7. Preheat oven to 325 degrees F. Bake the shell until slightly golden on the edges.
Coconut Cream/Assembly
1 cup Milk 5 Egg Yolks
1.5 tbsp Flour 1/4 cup Sugar 1 tbsp Butter
.25 oz gelatin powder
1.5 oz water1 can Coconut Cream (not milk)
1/4 cup powdered sugar
Tart Shells/Crust
Mango
Toasted Coconut
1. In a medium saucepan, combine milk and butter and bring to a gentle boil.
2. In the meantime, bloom gelatin in water.
3. In a bowl, whisk together flour and sugar. Gently mix in egg yolks until smooth.
4. When the milk is boiling, pour it gently into the egg mixture, whisking constantly. Pour the mixture back into the pot, and cook on low heat. Stir constantly to prevent any burning.
5. When the mixture is thickened, add the gelatin and melt into the pastry cream.
6. Run the pastry cream through a fine mesh sieve to remove any chunks.
7. Allow the pastry cream to cool completely.
8. Whip the creamy part of the coconut cream (not the liquid portion) with powdered sugar. When you open the can of coconut milk, do not shake it, and use a spatula or spoon to scoop out the white, solid portion. You do not need the liquid.
9. Once whipped slightly, take some of the cooled pastry cream and mix it into the coconut cream.
10. Take the mixture and fold it back into the remaining pastry cream.
11. Take your shells/crusts, and use a tip to pipe the desired amount. Place some sliced mango on top, and create a sandwich with another shell. This is one thing that you can be pretty creative with.
12. Garnish the tart with some toasted coconut flakes.
So sorry for the delay- I have had a BUSY few weeks. I got sick, got caught up with catering, and have just been unreasonably, overwhelmingly busy. Nonetheless, I hope you enjoyed the latest!
Sunday, February 14, 2016
Cake Pop Bouquet
Happy Valentine's Day! Whether today was a day spent with family, friends, significant others, or relaxing at home, I hope each and every one of you felt loved.
Flowers and chocolate seem to be the staples of any valentine gift. What girl doesn't love the two? I'm personally a huge fan of flowers. But my favorite flowers are ones that dry well or keep growing. These pops are a little bit of a twist on that- incorporating flowers, chocolate, and cake!
These are great to give to a friend, galentine, boyfriend, girlfriend, family member, or to treat yo-self. Not only are these cake pops a pretty treat, but they taste great! I used a delicious caramel buttercream for the cake, which tastes much better than any store-bought icing.
Cake Pop Flowers
Scrap Cake
1/2 cup White Candy Melts/Chocolate
2 tbsp Coconut Oil
1/4 cup Red Candy Melts/Chocolate
1 tbsp Coconut Oil
1. Mix the baked scrap cake with some caramel buttercream until the cake becomes pasty and doughy.
2. Roll the cake into balls, about 1 tbsp of cake for each. Place onto a lined sheet pan and freeze.
3. Melt the chocolate, and stir in coconut oil.
4. Take lollipop sticks and dip one end into the chocolate, and push it into the cold cake ball. Place the pop into the freezer to chill slightly.
5. Once the chocolate has solidified, holding the cake in place, dip your pops. You can get a cool swirl pattern by drizzling stripes of red and twisting the pop as you dip and raise it from the white.
6. Once the pop is dipped, gently shake off excess chocolate and stand to harden. Repeat for all of the pops.
7. with the remaining chocolate, use a small paring knife and 2" thick strips of parchment paper to create petals. Dip the knife into the chocolate, and place the edge lightly onto a strip of parchment at a 45 degree angle. Slide the knife off the paper, without creating a hole in the chocolate layer. You can make multiple petals on a strip of parchment
8. Take the strip of parchment and place it somewhere so that it is curved and the petals can harden. Once hardened, remove the petals from the parchment, and dip in chocolate to glue to the bottom of the pops.
9. This process must be done quickly and gently, so that the petals do not melt or break. It may take a few tries to get right, but the final product is well worth the effort!
Sunday, December 6, 2015
Apple Galette
Fall seems to be the perfect season for anything apple. Who doesn't crave a warm slice of apple pie with a scoop of smooth ice cream? Galettes are beautiful pastries that are kind of a cross between a pie and a tart. It's great because you don't need a pie pan or tart shell to make it! The free form crust is a simple, elegant finish to a lovely seasonal dessert.
Apple roses seem to be all the rage lately. They are so beautiful with an understated elegance. It's the perfect way to finish any apple dessert. The key to creating something with a slight delicacy is to have the apples shaved thin. I used a mandolin to shave my apples, and it allowed me to be able to form the flowers without breakage. It requires some additional patience, but it is well worth it.
Apple Galette
Crust
9 oz Flour
1.5 stick Butter
.5 tsp Salt
3 oz Cold Water
1. Cut the cold butter into small cubes (1cm x 1cm).
2. Put the pieces into the flour and salt. Make sure each cube is coated.
3. Press the butter to flat pieces.
4. Rub the butter between your fingers to make flakes. Continue until the butter chunks are about the size of a lima bean.
5. Create a well in the center of the flour and pour your cold water into it.
6. Bring your flour towards the center of the well a little bit at a time, until it is completely incorporated.
7. Flatten your dough slightly and wrap it in plastic. Place in the fridge for about 30 minutes to 1 hour, until it is chilled.
Frangipane (Almond Cream)
.5 stick Butter
2 oz Sugar
1.5 oz Almond Flour
1 egg
.5 oz Flour
.5 tsp Vanilla
1. Cream butter, sugar, and almond flour together in a bowl.
2. Add egg and vanilla.
3. Scrape the bowl to make sure that the ingredients are well incorporated.
4. Add flour and mix until incorporated.
Assembly
3 Medium Apples
3 tbsp Sugar
.5 tsp Cinnamon
.25 tsp Nutmeg
.25 tsp Ginger
1 Egg
1. Preheat oven to 350 degrees F.
2. Roll the pie dough into a circle, about 1/4 inch thick all the way through. Transfer to a sheet of parchment.
3. Use a spatula or spoon to spread the frangipane in the center, moving outward. Leave about 1.5 inches of space around the edges, so that you can close your pie.
4. Shave your apples using a mandolin. You should cut your apples into quarters, slice out the core, and then shave them carefully with the skin on.
5. Once the apples are shaved, arrange them over the top of the frangipane. I like to start from the center and move outward.
6. Once the apples are arranged, bring up the edges and fold gently to keep the round shape.
7. Gently whisk the egg and use a brush to egg wash the exposed dough.
8. Mix the sugar and spices in a small bowl and sprinkle it over the apples and onto the crust.
9. Bake for about 1.5 hours or until the crust is golden brown.
I like to bake my galette in a cast iron skillet. It heats very well and evenly, and it's just nice and homey. If you don't have a cast iron large enough, you can bake it on a cookie sheet. This tart is beautiful, and tastes as good as it looks! I took it to a potluck, and it was a huge hit!
Sunday, November 29, 2015
Flan
I hope everyone had an awesome Thanksgiving! I had the pleasure of hosting a Friendsgiving this year, to celebrate one of my best friends birthdays! We got together and feasted on a relatively traditional Thanksgiving meal (minus the turkey- I went with rotisserie chicken this time to save some time and energy). One of our less traditional items was flan.
My flan actually made an appearance at the Thanksgiving dinner I had with my family. One of my mom's favorite desserts is flan, so I had to make it for her favorite holiday. Since I was also hosting the birthday party the next day, I extra one to share with my friends. Cynthia really liked this recipe, so per her request, I had to share it. Its a really simple recipe to make, and it's definitely a crowd pleaser.
Flan (makes 1 large flan)
1/2 cup Sugar
2 tbsp Water
Drop of Honey
2 tbsp Water
1 cup Cream
1 cup Milk
3 eggs
1/2 cup sugar
1/2 tsp Vanilla Extract
1. Preheat oven to 250 degrees F.
2. In a small pot, bring 1/2 cup of sugar, 2 tbsp water, and a drop of honey to a rolling boil.
3. Cook the sugar until the boiling slows, and a dark caramel color is reached.
4. Remove the pot from the heat and quickly add the 2 tbsp of water. Be very careful when doing this step, as the sugar will boil very hard and can splatter. Shake the pot as the water cools the mixture to evenly thin the liquid.
5. Pour the mixture into a 9 inch cake pan and allow it to cool on a flat surface.
6. In a medium pot, pour cream and milk with half the remaining sugar. Bring to a boil.
7. Whisk 3 eggs with the remaining sugar in a bowl. When the cream boils, slowly add it to the eggs while constantly whisking.
8. Once the cream is fully mixed in, add the vanilla. Allow the mix to cool briefly.
9. Once the sugar has set in the pan, and the mix has cooled, gently pour it into the pan.
10. Place the pan into a casserole dish or large cast iron skillet, and pour water into the larger vessel so that the water level is 3/4 of the way up the pan.
11. Place the larger vessel into the oven and bake for about 2 to 2.5 hours.
12. When the custard has formed a skin, and jiggles very slightly, the flan is finished. Depending on the amount of air at the bottom of the pan, the flan may jiggle less or more. You can test if the flan is cooked by very gently pressing the custard. It should bounce back gently.
13. Remove the flan from the heat, and allow to cool for about 30 minutes.
14. Run a knife along the edge of the pan to separate the flan from the sides of the pan.
15. Place into the refrigerator until it is cooled completely. Turn over onto a plate when cooled and serve cold.
This is a great dessert that you can make in advance, or start and leave in the oven for a while. It's a laid back dessert that doesn't require a whole lot of maintenance to execute successfully. You can put it in the oven, and turn on Netflix for 2 hours while you wait! The best part is that it wouldn't be unproductive ;)
My flan actually made an appearance at the Thanksgiving dinner I had with my family. One of my mom's favorite desserts is flan, so I had to make it for her favorite holiday. Since I was also hosting the birthday party the next day, I extra one to share with my friends. Cynthia really liked this recipe, so per her request, I had to share it. Its a really simple recipe to make, and it's definitely a crowd pleaser.
Flan (makes 1 large flan)
1/2 cup Sugar
2 tbsp Water
Drop of Honey
2 tbsp Water
1 cup Cream
1 cup Milk
3 eggs
1/2 cup sugar
1/2 tsp Vanilla Extract
1. Preheat oven to 250 degrees F.
2. In a small pot, bring 1/2 cup of sugar, 2 tbsp water, and a drop of honey to a rolling boil.
3. Cook the sugar until the boiling slows, and a dark caramel color is reached.
4. Remove the pot from the heat and quickly add the 2 tbsp of water. Be very careful when doing this step, as the sugar will boil very hard and can splatter. Shake the pot as the water cools the mixture to evenly thin the liquid.
5. Pour the mixture into a 9 inch cake pan and allow it to cool on a flat surface.
6. In a medium pot, pour cream and milk with half the remaining sugar. Bring to a boil.
7. Whisk 3 eggs with the remaining sugar in a bowl. When the cream boils, slowly add it to the eggs while constantly whisking.
8. Once the cream is fully mixed in, add the vanilla. Allow the mix to cool briefly.
9. Once the sugar has set in the pan, and the mix has cooled, gently pour it into the pan.
10. Place the pan into a casserole dish or large cast iron skillet, and pour water into the larger vessel so that the water level is 3/4 of the way up the pan.
11. Place the larger vessel into the oven and bake for about 2 to 2.5 hours.
12. When the custard has formed a skin, and jiggles very slightly, the flan is finished. Depending on the amount of air at the bottom of the pan, the flan may jiggle less or more. You can test if the flan is cooked by very gently pressing the custard. It should bounce back gently.
13. Remove the flan from the heat, and allow to cool for about 30 minutes.
14. Run a knife along the edge of the pan to separate the flan from the sides of the pan.
15. Place into the refrigerator until it is cooled completely. Turn over onto a plate when cooled and serve cold.
This is a great dessert that you can make in advance, or start and leave in the oven for a while. It's a laid back dessert that doesn't require a whole lot of maintenance to execute successfully. You can put it in the oven, and turn on Netflix for 2 hours while you wait! The best part is that it wouldn't be unproductive ;)
Sunday, November 22, 2015
Dulce de Leche Macarons
Thanksgiving is around the corner!!! Basically a holiday revolving around food- a foodie's favorite ;) You can find a lot of great Thanksgiving recipes here on the blog. I haven't gotten to a turkey yet, but I'm sure you'll find lots of great sides and desserts to feast upon.
It's been a while since I've made a macaron-dedicated post. I actually was supposed to bring these to a church Thanksgiving potluck, but too many of them didn't turn out nice- sometimes my oven gives me a really hard time (ugh). Still, I managed to get at least a couple pretty ones.. I had to share the recipe because the flavor is great!
A lot of my recipes come together when I look through my fridge and find things that I don't know if I would use in my day to day food adventures. This recipe came together when I had some leftover buttercream from Helen's baby shower and sweetened condensed milk. Sweetened condensed milk makes the best dulce de leche. It's not your typical caramel- it's got a much deeper, creamier flavor that kind of makes your heart melt. Not to mention, it's a great "put it in a pot and forget about it" kind of recipe.
Dulce de Leche Macarons (makes about 30)
Shells
100 g Almond Flour
120 g Confectioner's Sugar
50 g Granulated Sugar
70 g Egg Whites (2 large whites)
Orange, Green, and Red Gel Color
1. Pulse almond flour and powdered sugar in a food processor until very finely ground. Be careful not to grind too long, because it will release all of the oils, ruining your final product.
2. Sift the powder with a medium-mesh sieve.
3. Place the particles that are too large to fit through the sieve back into the food processor, pulse, and sift again. Throw out the excess pieces.
4. In a grease-free bowl, place your egg whites and sugar. Allow to sit for a few minutes to begin to dissolve.
5. Use grease-free beaters on high speed to whip the egg whites to stiff peaks. Add in the gel color. You want a very full color because the added almond flour and sugar will dull the color. You're looking for a light brown/caramel color.
6. Use a rubber spatula to fold the powdered sugar and almond flour into the meringue until the batter moves slowly, like lava. If you run your spatula through it, it should fall together after 5-7 seconds.
7. Put the mixture into a piping bag fitted with a large round tip (3/8 inch).
8. Pipe rounds that are about an inch apart onto a nonstick baking mat (silpat) that is placed onto a cookie sheet.
9. Do this by holding the bag straight up about half an inch above the silpat, applying pressure to the bag until about 3/4 inch in diameter, and then lessen the pressure as you drag backward. Once you reach the desired length, quickly move the bag in the opposite direction that you dragged it, to leave a smooth edge. Make sure there is enough space to spread.
10. Rap your cookie sheet/sheet pan on the table a few times to make sure there are no bumps on the macaron shells.
11. Let rest until dry to the touch (about 30-45 minutes, longer on rainy days). Sprinkle a small amount of flake sea salt on the dried shell.
12. Preheat oven to 300 degrees F. If you have a convection oven, use convection.
13. Bake macaron shells on the second shelf of the oven for 14-17 minutes, until they do not wiggle when nudged.
14. Remove from oven and allow shells to cool completely before removing from the silpat.
Buttercream Filling
1 can Sweetened Condensed Milk
1 Egg White
1/4 cup Sugar
1/4 cup Butter
1. Carefully place the can of sweetened condensed milk into a pot of gently boiling water- do not remove the condensed milk from the can. You will want to boil the can for about 2.5 hours. Make sure you put the can on its side, and keep adding water to cover the can.
2. Once the time has finished, remove the can from the water with a slotted spoon or tongs, and allow the condensed milk to cool to room temperature. Do not open the can until it is cooled.
3. Fill a pot with some water and begin to boil.
4. Place the egg white and sugar into a medium sized, heat proof, grease-free bowl. Place the bowl on top of the pot of boiling water.
5. Stir until the sugar is completely dissolved (110 degrees F). Check by rubbing the mixture between your fingers to feel for sugar granules.
6. Mix on high speed to make a meringue.
7. When cool to the touch, add softened butter and mix until it comes together.
8. It will break apart and look like scrambled eggs. Continue to mix until it becomes a soft paste.
9. Once the dulce de leche is completely cool, fold about half into the buttercream. You may only need about half of the dulce de leche. Add more dulce de leche if you want more of the flavor.
Assembly
1. Pair the shells by size. You should have about 20 pairs of shells.
2. Put the buttercream into a piping bag with the same tip that you used to pipe the macarons.
3. Pipe the buttercream so that it is covering about 1/2 of the surface of the bottom of the shell.
4. Put the pairs together to create a "sandwich".
5. Place in the fridge overnight to allow the flavors to develop.
This is a recipe that is sure to impress. the little bit of saltiness adds a perfect depth to the sweet cookie. If you don't have time to make the macarons, you can always use dulce de leche on toast, ice cream, milkshakes, cookies, brownies... really anything that you want to make even more delicious. It's unique, tasty, and simple!
Sunday, November 15, 2015
Welcoming Baby Matthew!
This weekend, I was able to cater a baby shower for one of my friends from church! She's expecting her second- a little baby boy!! I was extremely excited to work with her to make some tea/brunch themed food for everyone who came to welcome baby Matthew!
One of the items on the menu was quiche! I was able to come up with 3 different flavors- caramelized onion, spinach and feta, and ham and cheddar. They were a great compliment to one another, and to the rest of the menu. I've included the recipe for the spinach and feta and ham and cheddar below!
You can get creative with the fillings for the quiche! The crust is a flaky pastry that greatly accompanies the rich egg custard filling. Any filling would go great with this!
Assorted Mini Quiche (makes 24)
Crust:
9 oz All Purpose Flour
1 stick Butter
3 tbsp Shortening
3 oz Cold Water
1. Cut the cold butter into small cubes (1cm x 1cm).
2. Put the pieces into the flour and salt. Make sure each cube is coated.
3. Press the butter to flat pieces. Add the shortening.
4. Rub the butter between your fingers to make flakes. Continue until the butter chunks are about the size of a pea.
5. Create a well in the center of the flour and pour your cold water into it.
6. Bring your flour towards the center of the well a little bit at a time, until it is completely incorporated.
7. Flatten your dough slightly and wrap it in plastic. Place in the fridge for about 30 minutes to 1 hour, until it is chilled.
Filling:
1 cup Milk
3 Eggs
2 Egg Yolk
1/4 tsp Salt
1/4 tsp Pepper
1/4 tsp Garlic Powder
1. Lightly beat your eggs and yolks.
2. Add milk and seasoning.
3. Pour into a container with a pour spout, or a liquid measuring cup.
Topping:
Spinach
Feta Cheese
Cheddar Cheese
Ham
1. Preheat the oven to 325 degrees F. Lightly grease two muffin tins.
2. Roll out your crust dough to about a quarter inch thick.
3. Use a 3 inch round cutter to cut out rounds.
4. Place the round into the muffin tin.
5. Press the dough into the bottom and sides of the tin. If you must re-roll the dough, be sure to chill it for about 15 minutes in between rolls. This is so the dough has a moment to rest and does not shrink.
6. Place spinach and feta cheese into to bottom of 12 crusts. You should tear the spinach to fit well into the crust.
7. Cut cheddar cheese and ham into small pieces, then place into the bottom of the remaining dozen crusts.
8. Pour the filling into the crust, filling almost to the top of each crust. You want to leave a short amount of space, just to prevent overflowing.
9. Bake the tarts for about 25-30 minutes, until the crust is golden and the custard is set.
10. Cool slightly and remove from the tins.
We had a few other great menu items to enjoy, too: scones and peach jam, tea sandwiches (egg salad, cucumber, and tomato), portabello and goat cheese spread with crackers, pumpkin cheesecake, cupcakes, and of course, macarons! We also had a fun blueberry spritzer for the ladies to enjoy.
I loved getting the opportunity to serve Helen and her family and some of our friends before the arrival from baby Matthew! We are so excited to welcome him into the world!!! If you want to have a deliciowhso catered event, click the tab above, and be sure to contact me! I'd love to connect and work with you to make your event perfect! :)
Sunday, November 8, 2015
Chi and Yusuke Wedding
Chi and Yusuke had a really beautiful wedding back in October. I was honored to be able to work with them to develop the cake that they wanted! Chi reached out to me towards the beginning of this year to see if I'd be able to do their wedding cake. A couple phone conversations and a tasting later, we had a plan for the perfect cake!
Chi and Yusuke ended up deciding to do a white sponge with a light chocolate mousse filling for their flavor. They wanted the cake to have a smooth buttercream on the outside, with a palette knife finish and decadent florals. They got the most beautiful gold cake topper that perfectly complemented the flowers.
This couple was such a joy to work with- they are both Atlanta artists and animators. They work together and have been dating for years! Chi made her own invitations and a lot of the decorations. Chi and Yusuke are a really kind couple, and I look forward to being able to work with them again!
Stay tuned for a fun recipe to celebrate fall next week!!! I think the technical difficulties have been solved- I'm so looking forward to posting regularly again!
Subscribe to:
Posts (Atom)