Showing posts with label cream. Show all posts

Sunday, June 12, 2016

Appa's x Delici-owh-so


I recently got the opportunity to partner with a local pop-up in Atlanta! A couple friends of mine invited me to join them as they bring sushi burritos and poke bowls to Atlanta. They will be popping up behind Irwin Street Market in Atlanta every Sunday 5:30pm-8:30pm for all of June and July (minus July 4th weekend). Everything is super delicious, made with love, and worth the wait!


I'll be featuring a different dessert (maybe two) every week. They'll have delici-owh-so macarons and cream puffs, alternating. The flavors will be different every time, so you should come out and try them!


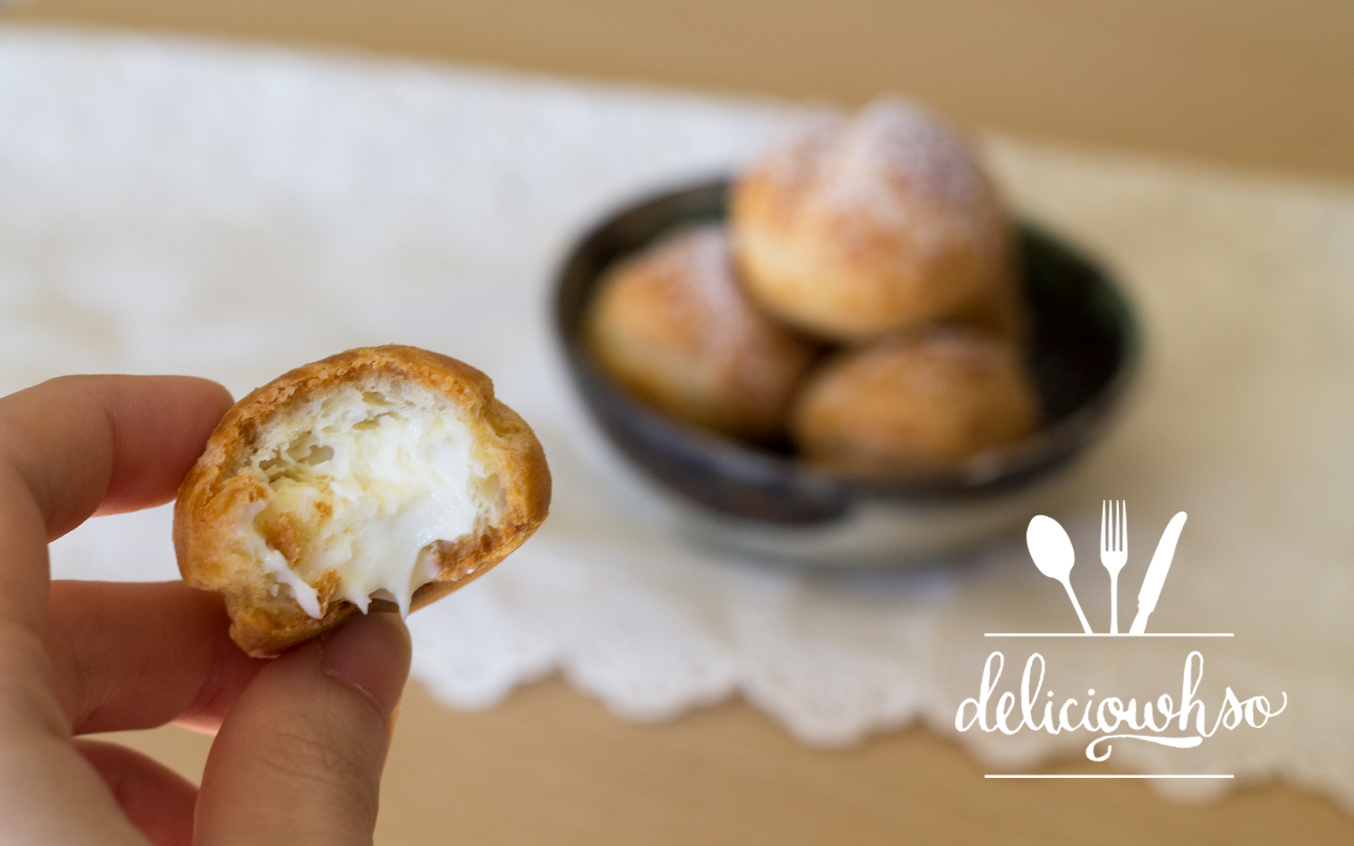
This week, I featured a green tea cream puff. They were topped with a crispy craquelin, which brought a fun texture and a sweetness that accompanies the choux pastry perfectly. They were filled with a light green tea filling that makes for a perfect ending to the sushi meal.


If you're local, this place is a MUST-TRY!!! The bowls and burritos are perfectly seasoned, and they're even better with the appa and umma sauces. Appa is spicy, and umma is sweet. It's a perfect topping for the fresh fish and crispy veggies. "Appa" is father in Korean, and "Umma" means mother. It's a cute and clever way to describe the sauces, and the flavors do not disappoint!


You can definitely tell that all of the food is made with a lot of love, effort, and passion by this one adorable family! I love that I get to take part in bringing great food to our city, and hope that everyone gets the chance to make it out! We put a lot of thought into every element of what we're sharing, and we look forward to the weeks to come! Follow @appasatl and @deliciowhso to see more updates on the featured desserts!


Sunday, May 8, 2016

Strawberry Champagne Tart


Strawberries are in season! Summertime is just about here, bringing the sweetest strawberries! Speaking of sweet- happy mother's day! I have been blessed with the sweetest mothers :) One of the memories I have is with my stepmom making fruit pizza- it's basically a bigger version of a fruit tart.

I guess you can call the fruit pizza a bit of an inspiration for this post. Fruit tarts are one of my favorite desserts, and I couldn't help but use the beautiful, ripe strawberries. The champagne cream filling is a perfect compliment, offering a creaminess with slight kick.


Strawberry Champagne Tart
For the crust
1 stick Butter
1/8 cup Sugar
1 egg yolk
1/2 cup Flour 
pinch Salt

1. In a bowl, cream softened butter with sugar until light and fluffy.
2. Add the egg yolk and incorporate well.
3. Add the flour and a pinch of salt and mix until combined.
4. Pour your dough out onto a plastic wrap and allow to rest in the fridge until firm.
5. Once firm, roll out until about 1/4 inch thick.
6. Line greased tart shell with the dough, trimming the edges. Repeat if you have multiple mini shells. Poke holes with a fork to vent.
7. Preheat oven to 325 degrees F. Bake the shell until golden. Remove from the oven and cool completely.

Champagne Cream
1 cup Milk
1 tbsp Butter
1/4 cup Sugar
2 Egg Yolks
2 tbsp Corn Starch
4 oz Champagne
.5 oz Gelatin Powder
3.5 oz Water
1 Cup Heavy Cream
3/4 cup Confectioner Sugar

Strawberries

1. Put 3/4 cup of milk into a pot with the butter.
2. Add half the sugar to the milk in the pot, and the other half into a bowl with the remaining milk.
3. Add yolks and corn starch to the bowl with the 1/4 cup of milk. Whisk to make into a slurry and combine well.
4. Heat the milk in the pot until it is scalding. Pour slowly into the bowl, while whisking. Pour the mixture back into the pot.
5. Whisk the mixture on low heat until it thickens. The mixture will boil, and the starchy flavor will cook out.
6. Immediately pour the mixture into a bowl.
7. Mix water and gelatin together. Melt in a microwave with champagne.
8. Add the gelatin mix to the pastry cream. Mix until combined.
9. In a separate bowl, whip heavy cream and confectioner's sugar to soft peaks.
10. Fold the heavy cream into the pastry cream into incorporated.
11. Pipe the cream into the cooled tart shells, and top with strawberries.


This is a great, refreshing summer treat! The sweet strawberries work perfectly with the crispy crust. It's best served right away, garnished with a little mint. It's the perfect treat for any occasion :)

Sunday, May 1, 2016

Earl Grey Creme Brulee


Creme brulee seems to be the epitome of fine dining. I think the smooth custard paired with the crisp finish intimidates home cooks. One thing I learned about creme brulee is that it's actually not a difficult thing to make at home. It's a simple process, though it takes a little bit of time.


I love to infuse my brulee with earl grey tea. It adds a complexity that helps to keep the rich custard from overwhelming. It's a smooth, smoky dessert. The only thing you really need to make it is a torch.


Earl Grey Creme Brulee (Makes 1 dozen)
16 oz heavy cream
125 g egg yolks
150 g Sugar
1 bag of earl grey tea
Sugar, to torch 

1. Preheat oven to 200 degrees F.
2. Heat heavy cream. Add the contents of the tea bag to the cream.
3. In a medium bowl, mix yolks and sugar together.
4. Once the cream comes to a boil, remove it from the heat and allow it to steep for about 5 mintues.
5. Pour it into the yolks through a fine strainer to strain out the tea leaves. Mix as you pour to keep from curdling the yolks.
6. Place a flexible muffin tin (silicone) onto a shallow sheet pan,.
7. Pour the mixture evenly into the silicone muffin molds. Then, place the sheet into the oven. Pour water into the sheet pan about halfway up.
8. Bake for about an hour and a half, until the centers are not loose anymore. It should have a very slight jiggle. You can turn off the oven and leave the door open when it is finished. This will vary based on your oven and mold. 
9. Remove from the oven when finished and allow to cool. Be very very careful as the water will be hot.
10. Once room temperature, place the sheet into the freezer to solidify the creme brulee.
11. Once solid, unmold the frozen creme brulee. Dip the tops (small side) in sugar  and torch until golden.
12. Serve soon after you brulee it. You should allow it to thaw slightly before serving.

If you don't have a flexible muffin mold, you can also use a regular muffin tin. After freezing the brulee, you will need to torch the bottoms (the metal) and cut around it with a knife. It's a little messier, but it's definitely do-able. You torch the tin gently so that you melt the bottom of the custard slightly, so that it releases from the tin. 


Sunday, March 27, 2016

Profiteroles (Choux Cream)


Happy Easter! I hope that everyone was able to celebrate and enjoy the day. This was my first Easter in a couple years that I wasn't working, which seemed strange. When I was working at the hotel, I worked Easter brunch, so I'd be there from about 5 or 6 am to set up until close to the end of brunch. After brunch I would head to church (back when my church had service at 4pm). Needless to say, Easter Sunday was always a long day, but it was always so rewarding and refreshing.

Thinking about Easter brunch at the hotel reminds me of all the desserts that I used to help put out with the rest of the team. I personally don't have the biggest sweet tooth, which is why I love choux so much! This french pastry is not very sweet, but pairs excellently with creamy fillings. You see it used for cream puffs/profiteroles and eclairs.


I paired this choux with a mascarpone filling. It's great with the choux, since it's smooth, creamy, and light. If you're a fan of chocolate or coffee, you could make a cocoa glaze to top it.

Choux Pastry (makes 50 small pieces)
250g Milk
150g Water 
185g Butter
8g Sugar
8g Salt
220g Cake Flour
400g Eggs
 
1. Bring milk, water, and butter to a boil in a large pot.
2. Reduce heat to low. Add flour, sugar, and salt all at once.
3. Mix the batter thoroughly until it combines into one mass.
4. Move the batter into a bowl and use a mixer to mix on low speed to cool off gently.
5. Crack the eggs into a container.
6. Pour the eggs slowly, about 2 at a time while mixing on low speed. Scrape the bowl between pours to ensure a smooth batter.
7. Place the finished batter into a piping bag fitted with a round tip. Pipe small rounds, about 1-1.5 inches in diameter onto a silpat.
8. Preheat the oven to 375 degrees F.
9. Spray the piped out choux lightly with baking spray. Bake in the oven until golden brown, around 18 minutes, rotating halfway through.
10. Remove the choux from the oven and allow to cool. Once cool, use a small knife or a sharp piping tip to poke a hole at the bottom of the pastry.

Mascarpone Cream
1 cup Milk
1 oz Butter
1.25 oz Flour
3 oz Sugar
1.5 oz Egg Yolks
.3 oz Gelatin
1.8 oz Water
8 oz Mascarpone Cheese
2.5 oz Powdered Sugar
1/2 tsp Vanilla Extract

1. Bring milk and butter to a boil.
2. In the meantime, whisk together flour and sugar in a bowl, and add the egg yolks.
3. Pour the milk into the egg mixture slowly, whisking constantly, then pour everything back into the pot. Turn your heat to low.
4. Whisk the mixture constantly and allow it to boil and thicken.
5. Pour the mixture through a strainer into a bowl.
6. Bloom gelatin in water, and melt. Pour it into the pastry cream mixture and let it cool slightly.
7. Put mascarpone and powdered sugar into the pastry cream and fold thoroughly. Add vanilla for flavor.
8. Place the filling into a piping bag fitted with a small round tip.
9. Pipe the filling into the choux pastry and serve. You can freeze or refrigerate these pastries as well, but they taste best freshly served.


Choux pastry is one of my favorites! I love that it's not very sweet, but adds the perfect balance of flavor with a smooth filling. The other thing I like about choux is that you can fill it with whatever filling that you want to.

Sunday, March 13, 2016

Coconut Cream Tart


3.14 is tomorrow! Pi day! Last year, I made a couple plum hand pies. This year, I shifted to a more modern version of a classic pie. I always remember cherishing pi day during elementary, middle, and high school. It's a math holiday that lets you bring pies to school and eat them during class. Sadly, in the working world, I don't get pi days... Still, it was always one of my favorite times of the year!


I love pies, but I can't help but want something more elegant from time to time. This is an easy way to make your "pie" look like something more upscale, without sacrificing flavor, texture, or too much time. It's definitely a great way to impress your guests! Plus, this is a great way to allow each guest to have an individual piece(s).


Coconut Cream Tart
For the shell/crust
1 stick Butter
1/8 cup Sugar
1 egg yolk
1/2 cup Flour 
pinch Salt

1. In a bowl, cream softened butter with sugar until light and fluffy.
2. Add the egg yolk and incorporate well.
3. Add the flour and a pinch of salt and mix until combined.
4. Pour your dough out onto a plastic wrap and allow to rest in the fridge until firm.
5. Once firm, roll out until about 1/4 inch thick. Then, cut desired shapes using a sharp knife or cutters.
6. Place onto a parchment lined sheet pan, and then freeze until solid.
7. Preheat oven to 325 degrees F. Bake the shell until slightly golden on the edges.

Coconut Cream/Assembly

1 cup Milk 5 Egg Yolks 
1.5 tbsp Flour 1/4 cup Sugar 1 tbsp Butter 
.25 oz gelatin powder 
1.5 oz water1 can Coconut Cream (not milk)
1/4 cup powdered sugar
Tart Shells/Crust
Mango
Toasted Coconut

1.  In a medium saucepan, combine milk and butter and bring to a gentle boil.
2. In the meantime, bloom gelatin in water.
3. In a bowl, whisk together flour and sugar. Gently mix in egg yolks until smooth.
4. When the milk is boiling,  pour it gently into the egg mixture, whisking constantly. Pour the mixture back into the pot, and cook on low heat. Stir constantly to prevent any burning.
5. When the mixture is thickened, add the gelatin and melt into the pastry cream.
6. Run the pastry cream through a fine mesh sieve to remove any chunks.
7. Allow the pastry cream to cool completely.
8. Whip the creamy part of the coconut cream (not the liquid portion) with powdered sugar. When you open the can of coconut milk, do not shake it, and use a spatula or spoon to scoop out the white, solid portion. You do not need the liquid.
9. Once whipped slightly, take some of the cooled pastry cream and  mix it into the coconut cream.
10. Take the mixture and fold it back into the remaining pastry cream.
11. Take your shells/crusts, and use a tip to pipe the desired amount. Place some sliced mango on top, and create a sandwich with another shell. This is one thing that you can be pretty creative with.
12. Garnish the tart with some toasted coconut flakes.


 This is one way to spice up a classic coconut cream pie, and make it something totally new. I love incorporating the tart mango with the creamy coconut filling. The crust is a perfect texture to add to this delicious treat! 

So sorry for the delay- I have had a BUSY few weeks. I got sick, got caught up with catering, and have just been unreasonably, overwhelmingly busy. Nonetheless, I hope you enjoyed the latest!

Sunday, June 28, 2015

Avocado Ice Cream


I've heard that your taste buds change every seven years or so. Avocados actually used to one of my least favorite foods. I couldn't stand them, and I would pick them out of everything. Now, I actually have grown to like avocados. 

My good friend, Cynthia, posted a recipe to my Facebook the other day that she wanted to try out together. She came over and we decided to give it a go! I adapted the recipe by Alton Brown just slightly to get the recipe below!


Avocado Ice Cream (Makes 1 quart)
2/3 cup Sugar
1.5 cup Milk
1 cup Heavy Cream
3 Avocados
1 tbsp Lemon Juice
1/2 tsp Salt

1. Prepare your ice cream machine according to the manufacturer's directions. This may involve freezing a vessel for 24 hours.
2.Heat milk and sugar on the stove until it is completely dissolved. If it boils, set it aside to cool for at least 5 minutes. 
3. Place avocados, heavy cream, lemon juice, and salt into a blender and blend until well pureed. 
4. If you do not have a blender, use an electric mixer to cream avocados and slowly add the cream, lemon juice, and salt until it becomes smooth. 
5. Slowly blend the milk into the mixture and mix until smooth and incorporated. 
6. Place the mix into the fridge until cooled completely. 
7. Churn the mix in an ice cream machine according to the manufacturer's directions. Remove from the ice cream machine when the mixture looks like soft serve. 
8. Place into a freezer-safe container and harden in the freezer for 3-5 hours. 
9. Allow the ice cream to thaw slightly before scooping into a frozen bowl and enjoying. 


This ice cream is delicious! It's smooth and tasty without being too sweet. It's got a slight earthiness to it that is really perfect for a hot summer day. Plus, avocados make it kind of healthy, right? 

Sunday, May 10, 2015

Roasted Strawberry Ice Cream


Strawberry season is upon us! What better way to celebrate than with some delicious ice cream? This is a creamy, rich ice cream with a load of roasted strawberry goodness. The caramel notes from the strawberries makes this the perfect way to transition into summer!


Roasted Strawberry Ice Cream (Makes about 1 quart)
1 cup Milk
2 cups Heavy Cream
1/2 cup Sugar
1 pinch Salt
6 eggs
1 tsp Vanilla Extract
1 package Strawberries
1/4 cup Sugar

1. Prepare an ice cream base. Do this by placing milk, cream, sugar, and salt into a pot.
2. Whisk the eggs in a large, heat-proof bowl.
3. When the liquid in the pot comes to a boil, slowly whisk it into the eggs. Then, pour it back into the pot.
4. Whisk it on medium heat until the mixture thickens, and coats the back of a spoon.
5. Immediately pour it through a strainer into a clean bowl. Stir in vanilla.
6. Allow the mixture to cool.
7. Place strawberries and sugar into a casserole dish.
8. Roast in the oven at 350 degrees F until soft and mushy. Turn every 5 minutes or so to prevent burning.
9. Once the strawberries are done, allow to cool, mash with a fork, and then add into the ice cream base.
10. Prepare your ice cream maker according to manufacturer's directions and spin the ice cream to a soft-serve stage.
11. Place into a freezer safe, airtight container and allow to harden for at least 3 hours in the freezer.
12. Allow to thaw slightly before scooping into a frozen bowl  or cone and serving.
 

School is out for a lot of students- and many of my friends are graduating! Congrats to everyone who has graduated/is graduating this year; hooray for the end of finals for current students; and keep on trekking on for those already in the working world... Let's all take a break with some delici-owh-so ice cream :)

And of course we can't forget about our mothers! I am extremely grateful for both my moms. My biological mom has been an essential part of my life, and influenced me greatly with my passion and excitement for food (both making and eating, haha). She's always there when I need, and supported me in my decisions. She makes the most delicious food in the world, and always fills it with her generous love. My stepmom hasn't known me all of my life, but she's been a really great role model, loving mother, and provider to me as well. She's got a big heart and loves me and Josh as her own, and I respect her so much for it :) Here's to being thankful and celebrating our mothers!

Sunday, April 12, 2015

Raspberry and Honey Goat Cheese Ice Cream

This recipe is a mouthful. Jeni's ice cream shop opened up a location in Atlanta about a year ago. Since then, I've been a few times. One of the most remarkable flavors that Jeni's has is a goat cheese and cherry ice cream. It's an artisan ice cream with tangy goat cheese, roasted cherries, and a richness that can't be bought in a grocery store.

This recipe is a play on the Jeni's goat cheese and cherry. I took some raspberries and mascarpone cheese and added it to to this recipe. The raspberries are a perfect texture change from the smooth ice cream, and the jam is a great way to complement the honey goat cheese.

Raspberry and Honey Goat Cheese Ice Cream (Makes 2 quarts) Adapted from Jeni's
1.5 cups Milk
1 tbsp Corn Starch
1 cup Heavy Cream
1 oz Light Corn Syrup
1/3 cup Sugar
2 tsp Honey
1/4 tsp Salt
2 oz Honey Goat Cheese
2 oz Mascarpone Cheese
1 package Raspberries
2 tbsp Raspberry Jam

1. Prepare your ice cream machine as the instructions direct (for mine, I have to put the freezing vessel into the freezer overnight).
2. Make a slurry with 1/4 cup Milk and the corn starch. Whisk it together to combine.
3. In a medium sized pot, put the remaining milk, cream, corn syrup, sugar, honey, and salt.
4. Bring the pot ingredients to a boil. Allow to boil for about 4 minutes.
5. In a separate bowl, mix the goat cheese and mascarpone cheese together until well incorporated and smooth.
6. After the ingredients in the pot have boiled for 4 minutes, slowly pour the slurry of milk and corn starch into the pot while mixing with a rubber spatula.
7. On medium heat, allow the mixture to come back to a boil and cook for about a minute, stirring constantly. The mixture will be finished when the starchy flavor cooks out and the consistency becomes slightly thick.
8. Pour a little bit of the hot mixture into the cheese, mixing to incorporate. Repeat until the mixture is smooth, and all of the hot has been incorporated.
9. Cover the mixture with plastic wrap, so that it is touching the surface. Place the bowl into the fridge until the mixture has cooled completely.
10. When cooled completely, pour into your ice cream maker and follow the manufacturer's instructions to churn.
11. When the ice cream is ready, it will look like soft serve. Prepare a container.
12. Mix in fresh raspberries after the ice cream has been spun, breaking them up slightly as you go. 
13. Place layers of ice cream and jam, so that when you scoop the ice cream you get a nice swirl-effect.
14. Freeze the ice cream for at least a couple hours before serving.
15. Allow to thaw slightly, for about 5 minutes, then scoop into a frozen bowl and share!

Georgia has had some really warm weather lately (I turned on my AC for the first time this year!). I can't help but crave some ice cream with the weather change (and to make me feel better about my pollen allergies). This ice cream is perfect for spring and doesn't take long to make!

Sunday, March 29, 2015

Hot Chocolate Pastry Cream

Winter is on its way out! And with it, hot cocoa. This is a great recipe to transition hot cocoa packets out of your pantry and into something more fit for spring. It's a simple recipe that can be used in whatever dessert you would like! It's great to fill tarts, eclairs, pies, or as a dipping sauce for fruit!

I took pie dough and folded it multiple times, before baking it into a compressed sheet and cutting my desired shapes from it. I'll provide the recipe below- so that you can recreate the bite-size layered pastries!

Pie Crust Circles
1 stick Butter
6 oz Flour
1/2 tsp Salt
2 oz Ice Cold Water

1. Cut the cold butter into small cubes (1cm x 1cm).
2. Put the pieces into the flour and salt. Make sure each cube is coated.
3. Press the butter to flat pieces.
4. Rub the butter between your fingers to make flakes. Continue until the butter chunks are about the size of a lima bean.
5. Create a well in the center of the flour and pour your cold water into it.
6. Bring your flour towards the center of the well a little bit at a time, until it is completely incorporated.
7. Flatten your dough slightly and wrap it in plastic. Place in the fridge for about 30 minutes to 1 hour, until it is chilled.
8. Roll out the dough into a long rectangle.
9. To make the flaky layers, you will have to perform folds to the dough. You will need to perform 2 tri-folds, and 2 book-folds, resting the dough for about 10 minutes in between each.

10. Tri-fold: This fold is very simple. You will need to roll your dough out to about 1/4 inch thick in the shape of a rectangle. Begin by bringing one end upward. Bring the other end downward to create 3 layers of dough.
11. Repeat this process. when you re-roll the dough, you should roll in the opposite direction of the folds.
12. Book-fold: After you have rested the dough from the second tri fold, re-roll the dough. Many people will fold the edges to the halfway point, and then fold it in half again. However, I advise against that, so that you will have even distribution of layers. Bring the top side to the 1/4 point, and then the bottom side of the dough to the same point. Then, fold the dough in half.
13. Roll the dough out and repeat.


Tri-Fold
Book-Fold
14. After resting the dough again, roll the dough out to a 1/4 inch sheet. Place the dough onto a baking sheet lined with parchment.
15. Cover with another sheet of parchment and another baking sheet to compress the dough.
16. Bake at 350 degrees F until both sides are golden brown. You may have to flip the dough if the bottom heat in your oven is very high.
17. Cut circles out of the dough after the dough is cooled.

Hot Chocolate Pastry Cream
1 cup Milk
1 tbsp Butter
1/4 cup Sugar
2 Egg Yolks
2 tbsp Corn Starch
1/2 tsp Vanilla Extract
1 packet of Hot Chocolate

1. Put 3/4 cup of milk into a pot with the butter.
2. Add half the sugar to the milk in the pot, and the other half into a bowl with the remaining milk.
3. Add yolks and corn starch to the bowl with the 1/4 cup of milk. Whisk to make into a slurry and combine well.
4. Heat the milk in the pot until it is scalding. Pour slowly into the bowl, while whisking. Pour the mixture back into the pot.
5. Whisk the mixture on low heat until it thickens. The mixture will boil, and the starchy flavor will cook out.
6. Turn off the heat and immediately pour the hot chocolate packet into the mixture.
7. Pour the mixture into a bowl or onto a plastic lined baking sheet and cover with plastic touching the custard.
8. Place into the refrigerator until completely cool.
9. Once set, you can pipe dough onto the dough circles and stack

This is a great way to use up your remaining hot cocoa as the weather warms up, and a simple dessert to share with your loved ones!

Sunday, February 15, 2015

Handmade Pappardelle with Mushroom Cream Sauce


I hope everyone had a great valentines day! Whether it was spent with friends, family, or significant others, I hope that you were all able be appreciative of whoever you were with, and show them love!

I showed my valentine some love with an Atlanta Hawks themed bouquet. If you missed some of the macarons I made, check out my instagram, @deliciowhso!

Anyways, let's move onto this week's post! Earlier in the week, my roommate and I made some delicious pasta! We took the handmade pasta recipe (click here), and cut them into thick strips for pappardelle pasta. The key to making the noodles is rolling them very thin. If you have a pasta maker, it's much easier, but we went with a rolling pin. With some elbow grease, he was able to make some great noodles!


Handmade Pappardelle with Mushroom Cream Sauce (makes 4 servings)

Pappardelle Noodles
 Handmade Pasta Dough

1. Section the dough into 4 sections and roll into a very thin sheet.
2. Use a pizza cutter or sharp knife against a straightedge to cut noodles about 1-inch thick.
3. Boil water, and season with salt.
4. Add the noodles to the boiling water and cook until tender, about 7 minutes.
5. Drain and cool the noodles.

Mushroom Cream Sauce
3 Chicken Thighs
3 Cloves Garlic
2 tbsp Olive Oil
10 Medium-Sized Baby Bella Mushrooms
1 cup Heavy Cream
1 tbsp Flour
1 tbsp Lemon Juice
2 Large Kale Leaves
Salt
Pepper 
Garlic Powder
Dried Thyme
Pecorino Cheese, for garnish

1. Cut chicken thighs into small pieces.
2. Mince garlic, slice mushrooms, and chop up kale.
3. In a large sauce pan, heat oil.
4. Add garlic and saute slightly. Then add chicken. Season with salt, pepper, and garlic powder. You want to season at every step of the way, so that the flavor is balanced and cooks into the food. Allow the chicken to cook at least halfway before continuing.
5. Add the mushrooms until slightly tender. Add seasoning as needed.
6. Add the cream, and mix well. Allow to simmer for about 5 minutes. Then, sift flour into the sauce. This will help the sauce to thicken.
7. Add the kale. It will seem like a lot, but it will cook down into the sauce. Turn it gently until it cooks down.
8. Add the pasta and mix well. Add lemon juice, and any seasoning it may need. Cook until the pasta becomes hot, and the sauce is thick.
9. Place onto a plate. Shave some pecorino with a vegetable peeler, and garnish the pasta. Serve immediately.


This pasta is a great way to impress friends and family! The sauce is simple, and delicious! It's a creamy sauce with just the right amount of acid to balance the mushroom flavor. A big thanks to Nam for making the noodles for me, and I hope all you readers will take the time to recreate this yummy dish!

Monday, January 19, 2015

Green Tea Cookies


Green Tea is one of my all-time favorite flavors. I love anything green tea flavored. If you've kept up with the blog, you know that it's been a while since I've put up a new green tea recipe.

These cookies are sweet, soft, chewy, and decadent! The white chocolate adds a richness to the matcha flavor. The green tea cookies are perfect for making ice cream sandwiches. They stay chewy, and are easy to bite into. I paired it with green tea ice cream. I have a recipe that you can find (here). If you're not feeling like breaking out the ice cream machine, vanilla ice cream also goes extremely well with these cookies.


Green Tea Cookies (Makes 24 cookies)
6 oz Butter
1 cup Sugar
1 1/2 tbsp Green Tea Powder
2 Eggs
1 tsp Vanilla Extract
1/2 cup White Chocolate Chips
1 1/2 cup Flour
1/4 tsp Baking Powder
1/2 tsp Salt
1/2 tsp Baking Soda

1. Preheat oven to 350 degrees F.
2. Cream soft butter, sugar, and green tea powder together until the color is light, and the texture is airy.
3. Add the eggs and vanilla gradually, scraping the bowl between additions.
4. Add the white chocolate chips to the batter and mix until they are incorporated.
5. Add the dry ingredients at once, and mix on low speed until the batter comes together.
6. Scrape down the sides and the bottom of the bowl, and allow to mix to evenly incorporate the ingredients.
7. On a parchment or foil lined baking sheet, scoop about 1.5 tbsp portions of batter about 3-4 inches apart. It may not look like much, but the cookies will spread a lot.
6. Bake for about 10 minutes, rotating the pan halfway through. They will poof up and look soft in the center. The cookie will settle as it cools.
7. Remove the cookies from the oven when the edges are golden. Allow to cool completely.
8. If you are using them for an ice cream sandwich, place in the freezer for about 20 minutes. Then, scoop a small portion of ice cream onto the cookie.
9. Sandwich the cookie and return to the freezer for about 10 minutes.This is to let the ice cream firm up.

You can store the ice cream sandwiches in the freezer in an airtight container for up to 3 weeks. If you are planning to eat them later, thaw the sandwich for about 3-5 minutes, just to let the cookie warm up a little.


The cookies I made came out to be about 3 inches in diameter. It makes a perfect snack to satisfy a sweet tooth!

Sunday, December 14, 2014

Holiday Eggnog


What's more reminiscent of the holidays than eggnog? The sweet, creamy, spicy flavor reminds me of the winter. With Christmas around the corner, it's the perfect treat for any time of day!

This recipe is very simple. It doesn't take too many ingredients, and can be made within an hour. The eggnog does need should cool overnight for the best flavor, but can be put over an ice bath for immediate use.

Holiday Eggnog (Makes 12 servings)
2 quarts Milk
1.75 cup Sugar
1.5 cups Egg Yolks
2 cups Heavy Cream
2 tbsp Vanilla
1/2 cup Spiced Rum
1/2 tsp Ground Nutmeg
1/4 tsp Cinnamon

1. In a large pot, pour milk and half the sugar. 
2. In a large bowl, whip the remaining sugar and the egg yolks until it is pale in color. 
3. Heat the milk until it boils.
4. As the milk boils, slowly add it to the egg yolks, while stirring. Then, pour the yolk mixture back into the pot. 
5. Reduce the heat to low, and stir until it thickens. It should coat the back of a wooden spoon. 
6. Remove the mixture from the heat and strain into a clean bowl. 
7. Add the cinnamon, nutmeg, vanilla, and rum. 
8. Gently stir in the cream and refrigerate until cold. 
9. Serve cold in a chilled glass. 

I like to garnish my glasses with a candy cane. It's festive, and it adds another dimension of flavor to the drink. The minty candy increases the chill and adds a gentle peppermint that deepens the flavor of the spices.

This drink is the best for any holiday party. You can add more rum or skip the rum altogether- whatever best fits the occasion. This recipe makes a lot, so it's a great option to take to a potluck!

Sunday, April 27, 2014

Banana Pudding


Banana pudding is a classic American dessert, and perfect for any springtime gathering! Many recipes call for pudding packets, but making banana pudding from scratch is not as difficult as you think!

I made this pudding for a cookout with my fellowship, Reformed University Fellowship. It was a really great time getting to see so many of my good friends together. We had some senior testimonies, where seniors came and spoke to the group about the lessons they've learned through their college years, and the impact the fellowship community has made in that time. It was a great time filled with tears, joy, "aw"s and laughs. I have been extremely blessed to know all of those people and it's crazy that my college time is already coming to an end.

Now onto the recipe :) I had many requests for it tonight, so hope everyone enjoys!

Banana Pudding 
2 cups Milk
10 Egg Yolks
1/4 cup Flour
1/2 cup Sugar
2 tbsp Butter
1/2 tsp Vanilla Extract
2 Bananas
1/2 cup Heavy Cream

1 Banana 
1 box Nilla Wafers
3 tbsp Sugar
1/2 cup Heavy Cream
Chocolate Chips (to garnish)

1. Heat milk and 1/4 cup of sugar in a medium pot on medium heat.
2. Whisk remaining sugar and flour together in a medium bowl and slowly add the egg yolks, while whisking constantly.
3. When the egg mixture is completely combined, set aside.
4. Prepare a small casserole or bowl by wiping the inside with a wet towel or sponge. Then, place a layer of plastic wrap on the inside and stick it to the wet surface. Have a medium-mesh sieve placed on top. 
5. When the milk is scalding, slowly pour it into the egg mixture, whisking constantly.
6. Pour the egg mixture back into the pot on low heat.
7. Whisk constantly, while touching the bottom of the pan with the whisk, so that no part of the custard burns. Whisk until the custard boils for about a minute, and is thick.
8. Immediately pour the custard through the sieve onto the casserole dish or bowl.
9. Cover the top with plastic wrap and place in the refrigerator to cool. You want a thin layer of custard to speed up the cooling process.
10. Mash 2 bananas with a spoon or with your hands.
11. Whip the first heavy cream with an electric mixer to medium to stiff peaks.
12. When the custard is cool, transfer it into a bowl and add the banana.
13. Gently fold in the whipped cream until it is all incorporated.
14. In a serving dish or in small glasses, add a layer of banana pudding, a few pieces of sliced bananas (1 if it's in an individual glass), and a layer of nilla wafers. Repeat until you run out of pudding.
15. Whip the remaining cream with sugar to stiff peaks.
16. Make a decorative layer of whipped cream on the top by using a piping bag (or ziploc bag) fitted with a star tip. If you do not have icing tips, you can cut the tip of the ziploc to a point, with the seam at the center of the point.
17. Top with chocolate chips, and serve cold.

It is a good idea to make the pudding a day in advance, so that all the flavors can mesh, and so the wafers become cakey. If you do make the pudding early, layer everything except for the whipped cream, and then chill. Whip the cream the day of, so that it does not deflate, soften, and so it stays fresh.

Sunday, March 23, 2014

Cream of Asparagus Soup


Yesterday, I went on a day trip to Boston, exploring the city and eating food. I was excited to stop by Haymarket, which is a weekend market where farmers sell produce for extremely low prices. The place is extremely hectic, the floors are dirty with dropped fruits and vegetables, there's barely space to move, and the vendors are yelling constantly. However, the produce is extremely cheap. I was able to score 3 bunches of asparagus for $1! Sadly, I was too excited and took the first ones I found (which happened to be as soon as I walked into the plaza). As I walked around, I saw the same deal, but with much fresher looking asparagus... But still, it was only a dollar! I came home and had to trim off more from the asparagus than I would have liked, but it was still good enough to make some yummy soup!

Cream of Asparagus Soup (Makes 4 small servings)
1 lb Asparagus
1 tsp Salt
1/2 tsp Pepper
1/2 tsp Garlic Powder
1 tbsp Lemon Juice
2 tbsp Olive Oil
2 cups Water
4 cloves Garlic
1 cup Heavy Cream
2 tbsp Butter
1/4 cup Sour Cream
1 tsp Salt
4 tbsp Sour Cream, for garnish
4 slices Bacon, for garnish (optional)
2 tbsp Olive Oil, for garnish
1 tbsp Lemon Juice, for garnish
Baguette, for garnish

1. Preheat oven to 350 degrees F.
2. Rinse and trim the ends off of the asparagus.
3. Place onto a baking sheet and season with salt,  pepper, garlic powder, lemon juice, and and olive oil.
4. Bake until tender, about 20 minutes.
5. Cut the asparagus after its cooled down into 1 inch pieces.
6. Place into a medium sized pot with 1 cup of water. With 4 roughly chopped cloves of garlic
7. Boil the asparagus for about 10 minutes, until very tender.
8. Use an immersion blender to puree the asparagus. If you don't have an immersion blender, use a regular blender.
9. Once the asparagus is smooth, add cream, butter, sour cream, and salt.
10. Mix until smooth, and thickened. It will not be completely smooth, since the asparagus fibers are not smooth. The finished soup will have a chowder or bisque consistency.
11. Slice baguette and toast in the oven.
12. Cook bacon until crispy. Cut into small pieces.
13. Pour soup into serving bowls and top with a dollop of sour cream (about a tbsp), sprinkle of bacon pieces, drizzle (1/2 tbsp) of olive oil, and a small squirt of lemon juice (1/4 tbsp). Finish with the toasted baguette slices and serve immediately.

The soup alone can look like baby food, but the garnishes add a color and texture to the soup to make it much more appetizing. You can toast the remaining baguette and serve it with the soup. It's very rich, so it's a good idea to have the extra bread to balance.


 Markets like Haymarket aren't anything like the boutique farmers markets where organic farmers sell their locally grown produce for high prices. It's more like the TJ Maxx of produce, but dirtier, cheaper, and louder. The produce that the grocery stores do not accept get taken to the market to be sold for lower prices. You have to look a little harder to find quality produce, but for the bargain, the inferior quality is not something to be upset about. 

Sunday, January 5, 2014

Creamy Chicken and Veggie Pasta

The start of a new year usually means resolutions to eat healthier, lose weight, and be fit. These tasks can often be daunting, and viewed as impossible. Healthy eating seems like it would result in bland, tasteless food without any substance. However, you can make food that's healthy and delicious! Making healthier choices can be as simple as using whole wheat pasta or adding a few more veggies. Skip butter for low-fat oils, and seek to eat lean meats. I decided to take food that I really enjoy and choose healthier options. Try this simple, inexpensive, and quick recipe to kickstart healthy eating for your family!

Creamy Chicken and Veggie Pasta (Makes 8 Servings)
1 lb Whole Wheat Rotini Pasta 
1 tbsp Olive Oil
1 lb Chicken Tenderloin or Breast
1/4 tsp Dried Sage
1/4 tsp Dried Basil
1/4 tsp Dried Thyme
1/2 tsp Salt
1/4 tsp Black Pepper
1/2 tsp Garlic Powder
8 oz Sweet Baby Bell Peppers
8 Baby Bella Mushrooms
6 oz Baby Spinach

2 tbsp Lemon Juice
1 cup Heavy Cream
1 tsp Salt
1/4 tsp Black Pepper
1/2 tsp Garlic Powder

1. In salted water, boil pasta to al dente, following the package directions.
2. Cut mushrooms into slices, dice bell pepper, and set aside.
3. Cut chicken breast into bite-size pieces.
4. In a hot pot, large saute pan, or wok, pour olive oil. When the oil is hot, add chicken and seasonings. Cook for about 3 minutes, until the chicken is almost completely cooked.
5. Then, add vegetables and cook slightly, for about a minute.
6. Add pasta, lemon juice, cream, and the remaining seasoning.
7. Mix thoroughly so that all of the flavors are well incorporated.
8. Remove from heat and serve to your close friends and family.

This may not be the healthiest option available, since it has a lot of carbs from the pasta and is made with cream, but it is a healthier way to enjoy pasta. Eating healthy does not mean that you have to restrict yourself to unseasoned chicken breast and kale for every meal; you can make healthier choices and reduce portions to create a flavorful, delicious, and simple meal. Happy New Year everyone! I hope this year is filled with lots of blessings and good fortune! Continue to share this blog!

Sunday, November 24, 2013

Creamy Squash Pasta


Winter squash is now in season!!! I went to a local supermarket and the squash was on sale for 89 cents per pound! I had to get one. I wanted to try something more unique than simple roasted squash or soup, so I created a pasta with colorful vegetables that is served in the roasted squash! This recipe isn't the simplest of recipes, but it is extremely delicious! The long list of ingredients is not as long as it looks- because you have to season every step of the way, and because you use all of the parts of the squash. Try this recipe today and surprise your guests!

Creamy Squash Pasta (Makes 2 servings)
Roasted Acorn Squash Bowl
1 Acorn Squash
1 tsp Sugar
1/2 tsp Salt
1/4 tsp Garlic Powder
1/2 tsp Pepper
2 tbsp Butter

1. Preheat oven to 350 F.
2. Cut the acorn squash in half, horizontally. If there's a stem, cut off the stem as well. Be extremely careful when cutting because the squash is difficult to cut. If you aren't careful, the knife will slip. If the melon will not stand straight, cut off a portion of the bottom so it will stand without rolling around.
3. Pull out the insides of the squash. Save every part! Place the seeds into one bowl, and the insides of the squash into another.
4. Use a melon baller to remove the insides of the squash. Do this all around the cavity until there is about a 3/4" border all the way around. Place that into the bowl with the insides.
5. Place squash halves, face up, onto a sheet pan.
6. Season with salt, pepper, and garlic powder.
7. Cut butter into 1/2" cubes. Place on the edges of the squash and the inside.
8. Bake for about 40 minutes, until tender. 

Acorn Squash Seeds
1/2 tsp Salt
1/2 tsp Pepper
1 tbsp Butter
1 tbsp Brown Sugar

1. Spread seeds onto a foil-lined toaster oven pan. If you don't have a toaster oven, place in the oven
2. Season with salt and pepper.
3. Place small chunks of butter over the seeds.
4. Toast until slightly golden.
5. Add brown sugar and allow put back into toaster oven until sugar completely melts and begins to bubble.
6. Remove and allow to cool.
7. Break the up the seeds with your hands.

Creamy Squash Pasta
1/2 box Linguine
1tbsp Salt 

1 tbsp Butter
2 cloves Garlic, minced
4 Leaves Sage, minced
Insides of Squash
1/2 tsp Salt
1/4 tsp Pepper
1/2 cup Water
1 cup Heavy Cream
1/2 tsp Salt
1/2 tsp Pepper
1/2 tsp Garlic Powder
1 tbsp Lemon Juice

1 tbsp Oil
1/2 Onion
1/2 Green Pepper
1 Small Carrot
1 tsp Salt
Fresh Sage (for garnish)


1. Boil water and salt for the pasta.
2. When boiling, add pasta and cook until al dente.
3. Julienne (cut into thin strips) the vegetables and set aside while you wait for the pasta to cook.
3. Pour the cooked pasta into a strainer and rinse with cold water to stop the cooking.
4. Heat pot that you cooked the pasta in on high heat. Add butter, garlic, sage, and insides of squash.
5. Allow to sear slightly. Add seasoning.
6. Reduce heat to low-medium. Allow squash to soften.
7. Add water. Simmer the squash, and use a fork to smash it as it softens more.
8. Add cream, salt, pepper, and garlic powder.
9. Allow to simmer. Add lemon juice.
10. Allow to simmer until it thickens slightly.
11. Remove from heat, and use an immersion blender to ensure that the squash and cream are completely emulsified. If you do not have an immersion blender, you can use a food processor, but be careful not to overfill it.
12. In a saute pan, heat oil.
13. Once hot, add vegetables and saute until cooked. The onions will be translucent at that point.
14. Add the vegetables to the sauce. Then, add the pasta and mix until well incorporated.
15. Place the pasta into the roasted acorn squash bowl.
16. Garnish with freshly cracked pepper, chopped sage, and toasted squash seeds.

If you want to make more, just multiply the recipe for however many guests you plan to feed! I made this for my lovely roommate, Betsy, and it was delicious! If you want to add protein, I recommend adding chicken tenderloin. You can season and cook the chicken in the saute pan before adding the vegetables. Add the vegetables when the chicken is 3/4 cooked. The tender chicken would offset the crunchy seeds to create a myriad of textures and flavors. Though the recipe for this pasta is lengthy, it is not extremely difficult to make! As long as you stay organized and clean, it is easy to do! Try this unique pasta at home and share with your closest friends!