Showing posts with label french. Show all posts

Sunday, March 27, 2016

Profiteroles (Choux Cream)


Happy Easter! I hope that everyone was able to celebrate and enjoy the day. This was my first Easter in a couple years that I wasn't working, which seemed strange. When I was working at the hotel, I worked Easter brunch, so I'd be there from about 5 or 6 am to set up until close to the end of brunch. After brunch I would head to church (back when my church had service at 4pm). Needless to say, Easter Sunday was always a long day, but it was always so rewarding and refreshing.

Thinking about Easter brunch at the hotel reminds me of all the desserts that I used to help put out with the rest of the team. I personally don't have the biggest sweet tooth, which is why I love choux so much! This french pastry is not very sweet, but pairs excellently with creamy fillings. You see it used for cream puffs/profiteroles and eclairs.


I paired this choux with a mascarpone filling. It's great with the choux, since it's smooth, creamy, and light. If you're a fan of chocolate or coffee, you could make a cocoa glaze to top it.

Choux Pastry (makes 50 small pieces)
250g Milk
150g Water 
185g Butter
8g Sugar
8g Salt
220g Cake Flour
400g Eggs
 
1. Bring milk, water, and butter to a boil in a large pot.
2. Reduce heat to low. Add flour, sugar, and salt all at once.
3. Mix the batter thoroughly until it combines into one mass.
4. Move the batter into a bowl and use a mixer to mix on low speed to cool off gently.
5. Crack the eggs into a container.
6. Pour the eggs slowly, about 2 at a time while mixing on low speed. Scrape the bowl between pours to ensure a smooth batter.
7. Place the finished batter into a piping bag fitted with a round tip. Pipe small rounds, about 1-1.5 inches in diameter onto a silpat.
8. Preheat the oven to 375 degrees F.
9. Spray the piped out choux lightly with baking spray. Bake in the oven until golden brown, around 18 minutes, rotating halfway through.
10. Remove the choux from the oven and allow to cool. Once cool, use a small knife or a sharp piping tip to poke a hole at the bottom of the pastry.

Mascarpone Cream
1 cup Milk
1 oz Butter
1.25 oz Flour
3 oz Sugar
1.5 oz Egg Yolks
.3 oz Gelatin
1.8 oz Water
8 oz Mascarpone Cheese
2.5 oz Powdered Sugar
1/2 tsp Vanilla Extract

1. Bring milk and butter to a boil.
2. In the meantime, whisk together flour and sugar in a bowl, and add the egg yolks.
3. Pour the milk into the egg mixture slowly, whisking constantly, then pour everything back into the pot. Turn your heat to low.
4. Whisk the mixture constantly and allow it to boil and thicken.
5. Pour the mixture through a strainer into a bowl.
6. Bloom gelatin in water, and melt. Pour it into the pastry cream mixture and let it cool slightly.
7. Put mascarpone and powdered sugar into the pastry cream and fold thoroughly. Add vanilla for flavor.
8. Place the filling into a piping bag fitted with a small round tip.
9. Pipe the filling into the choux pastry and serve. You can freeze or refrigerate these pastries as well, but they taste best freshly served.
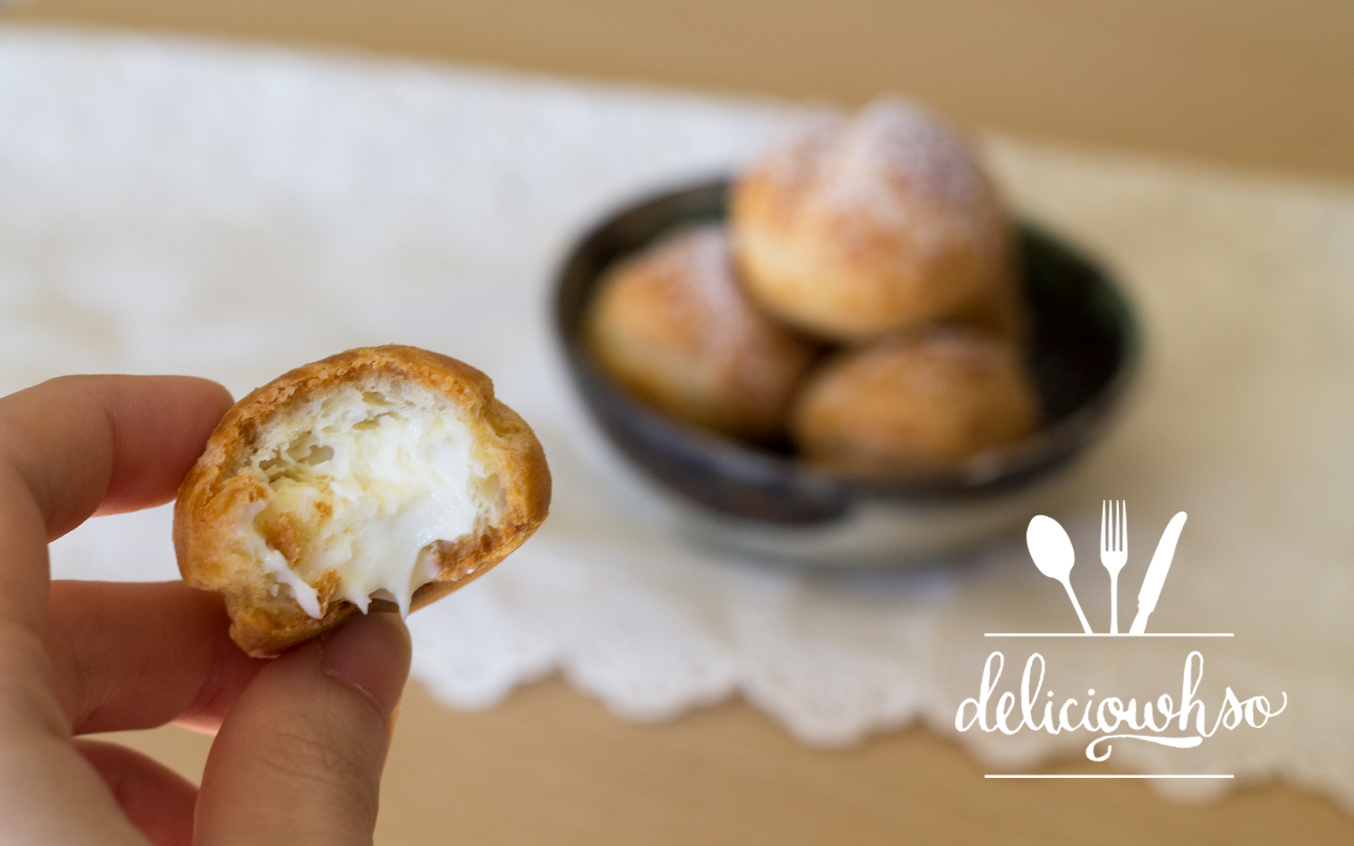

Choux pastry is one of my favorites! I love that it's not very sweet, but adds the perfect balance of flavor with a smooth filling. The other thing I like about choux is that you can fill it with whatever filling that you want to.

Sunday, August 3, 2014

Berry Mint Mojito

A couple of weeks ago, I catered a bloggers brunch with some of Atlanta's top style bloggers at Lululemon. It was great to experience catering for the women, and it was awesome to be able to see their smiling faces upon eating the food.

One of the most popular items on the brunch buffet was the berry mint mojito! It's a beautiful summery drink that boasts fruity, refreshing flavors. It's easy to make, and makes a beautiful presentation to any guests you serve it to. The cocktail is very light, refreshing, and delicious!


Berry Mint Mojito (Makes 6)
1 cup Sugar
1 cup Water
8 Mint Leaves
6 oz White Rum
Strawberries
Raspberries
Blueberries
Blackberries
1 liter Sparkling Water

1. In a small pot, bring the sugar and water to a boil.
2. Tear the mint leaves a couple of times and add to the sugar solution.
3. Allow the sugar solution to cool completely. Then, strain into a vessel, such as a jar, to pour into glasses. Place the vessel with the solution into the fridge to make it cold.
4. Place a couple of each berry into the bottom of a highball glass with about an ounce of rum and an ounce of the sugar solution.
5. Use a muddler or the end of a wooden spoon to muddle the berries into the rum and sugar solution.
6. Add sparkling water to fill the glass, and add a few ice cubes to keep cold.
7. Garnish with a sprig of mint and serve immediately.

Not only is this drink simple and quick to make, it is entertaining to watch! It's a great way to spruce up a party- and show off your excellent bartending skills ;)

Now, for the brunch recap! This was actually my first delici-owh-so catered event, and it was actually pretty successful! The ladies seemed to enjoy the food, and the space was very well made for the type of event that Lululemon was hosting. At the brunch, people discussed visions and goals, which actually made me think about some that I have for this blog. This blog started out as a simple way to share my passion for food, and expand on it by honing my photography skills, and sharpening my writing skills. Of course, I will always have more to learn, but I think over the past year I've been developing more of a vision for myself as a blogger, but also as a professional. I hope to continue to be able to touch people's lives through my love of food, but in a more tangible way- through catering for them! I hope to get into doing desserts for small weddings and small events like this! I think this brunch was a small step to developing delici-owh-so as a brand. Still, there's much to plan and look into before I can make any of those goals a reality. Although that description sounds pretty vague, I hope it keeps all the readers on edge for what's to come! Anyways, here are some pictures from the brunch!

Spinach, Heirloom Tomato, and Goat Cheese Frittata
This frittata was very light, fluffy, and healthy! A perfect brunch option for any vegetarians out there!

Bacon Cheddar Biscuits- recipe here!
These biscuits are flaky, flavorful, and scream southern comfort! Simple and delicious!

French Toast with Orange Anglaise and Mixed Berries (Left); Desserts (Right)- Nectarine Mint Macarons, Coffee Chocolate Chip Cookies, Blueberry Muffins (click items for recipes!)
The macarons were the biggest hit for this event- and the recipe is posted on the blog! Be sure to check it out :)
Mimosa (left); Berry Mint Mojito (right)
These were very popular drink items that went perfectly for an afternoon brunch! :)

Photo By Futuristic Vintage
Me with the buffet :)

If you'd like your event to be delici-owh-so- catered, check out the box to the right! You can leave messages and ask about having your event catered by delici-owh-so! Not only do I cater brunches, but you can also special order custom macarons!

Sunday, February 16, 2014

French Onion Soup

 
Cold weather always makes me feel like eating soup. When it's freezing outside, I want to eat something hot to warm up! French Onion Soup has always been a favorite of mine. It's comfort food at its finest. The warm, rich broth with soft bread and stringy, melty cheese- there's nothing better on a cold day! This recipe for French Onion Soup is simple to make, and doesn't require too  much attention. It takes a little bit of time to properly caramelize the onions, but it's worth the wait! French Onion Soup is traditionally made with a little wine to deglaze the pan, but I make mine without it. The flavor is still rich, deep, and onion-y. 

French Onion Soup (Makes 4 Servings)
3 tbsp Butter
2 Onions
1 clove Garlic
32 oz Beef Stock
1 tsp Salt
1/2 tsp Black Pepper
1/2 Baguette
8 slices Provolone Cheese

1. Slice the onions into thin, 1/4 inch slices. 
2. In a medium pot, melt butter on medium heat. 
3. Once the butter is melted, add the onions. Mix the onions to coat with butter. 
4. Turn down the heat to low. Continue to cook the onions, stirring occasionally. 
5. Cook the onions for about 30 minutes, until caramelized. Don't rush this process, because you want the onions to be perfectly caramelized for the soup! Here's a picture of the finished onions.

6. Add the garlic and gently mix into the onions.
7. Add a little bit of beef stock to deglaze the pot slightly, and then add the remaining stock. 
8. Raise the heat to bring the soup to a boil, and then return to low heat to simmer for 45 minutes. Simmering the soup allows the flavors to develop fully, so that you can enjoy a full-bodied onion flavor. 
9. Preheat the oven to 475 degrees F. 
10. Slice the bread so that you have 8 slices. You can toast them slightly if you'd like. 
11.Place 4 oven-safe bowls onto a sheet pan.
12.When the soup has finished simmering, pour into the oven-safe bowls. Place 2 slices of bread and 2 slices of cheese over the top.
13. Place into the oven for about 5-10 minutes, until the cheese has melted completely and browned slightly. 
14. Remove from oven, place the bowls onto soup plates, and serve immediately. 

French Onion Soup takes some time to create, but if the time is taken to properly make it, the flavor is bold. The process is simple, and the ingredients are not very expensive, so be sure to make some for friends and family :) 

I've also reached 10,000 page views as of yesterday! A HUGE thanks to everyone keeping up with this blog, and sharing with their friends. Continue to share, create, and enjoy!

Sunday, December 29, 2013

Eggnog French Toast

Holiday season calls for festive flavors with lots of winter spices. One of the first winter drinks that comes to mind for me is eggnog! Yes, it's a great drink to enjoy during winter, but it is also a great way to make a sauce! This french toast is a filling, delicious winter breakfast that is simple and quick!

Eggnog French Toast (Makes 2 Servings)
Eggnog Anglaise
4 Yolks
1/2 cup Milk
4 tbsp Sugar
1 tsp Corn Starch
1 tbsp Whiskey

1. Heat milk with half of the sugar to a boil.
2. Mix yolks, corn starch and remaining sugar together until completely incorporated.
3. When milk is boiling, slowly add to the eggs, whisking constantly.
4. Pour the mixture back into the pot and mix until it thickens.
5. Pour into a clean bowl through a fine sieve to ensure that curdled pieces do not get through.
6. Add whiskey and mix. If you would like a stronger whiskey flavor, add more.
7. Cool the anglaise over a ice bath by placing the bowl into a bigger bowl filled with ice and a little cold water. 

Winter Spice French Toast
6 Hawaiian Rolls
1 Egg
1/4 cup Milk
Pinch Nutmeg
Pinch Cinnamon
1/4 tsp Salt
1 tbsp Sugar
Fresh Berries
Whipped Cream

1. Slice the crust off of the rolls, then slice the rolls in half to make them thinner.
2. Whisk remaining ingredients together until completely incorporated.
3. Heat a frying pan and add oil or butter to prevent the bread from sticking.
4. Dip the bread on each side in the egg mixture, then place onto the frying pan.
5. Flip when golden.
6. Remove from heat when both sides are golden brown. Then, arrange the pieces of toast onto a plate.
7. Top with fresh berries, whipped cream, and eggnog anglaise.

I took the remaining eggnog anglaise and made some ice cream. If you make a bigger batch of anglaise, just spin it in an ice cream machine, according to the manufacturer's directions. Allow the ice cream to harden in the freezer for at least 3 hours after churning. This creates a smoother, fuller texture.

I think brunch is such a wonderful time. There's something special about making brunch for your friends and enjoying the late breakfast/early lunch. The french toast is an inexpensive, delicious, and simple brunch that boasts elegance, flavor, and class. Make some for your friends and family this holiday season!