Showing posts with label seasonal. Show all posts

Sunday, November 13, 2016

S'mores Bread Pudding


Fall has me thinking about warm desserts to welcome the colder weather. Usually, when I think desserts, I'm thinking something cold or room temp, whether it's pies, tarts, cake, ice cream, or custard. Nonetheless, there is little better than a warm bread pudding to lift your spirits.

Smoky marshmallow, melted chocolate, and soft bread and graham crackers make this a fun treat. I love it best served with ice cream when it's fresh out of the oven.


S'mores Bread Pudding
Bread (Enough to fill a 9 x 13 inch casserole dish most of the way)
1 cup Milk
1 cup Heavy Cream
9 Eggs
1 tsp Vanilla Extract
1/4 cup Sugar
1/4 cup Brown Sugar
1/2 cup Chocolate Chips
1/2 cup Graham Crackers, crushed
1/2 cup Mini Marshmallows

1. Preheat oven to 350 degrees F. Slice bread to 1 inch by 1 inch cubes.
2. In a medium pot, boil heavy cream and milk. In the meantime, whisk eggs, vanilla, brown sugar, and sugar in a large bowl.
3. Once the cream comes to a boil, pour the mixture slowly into the eggs, whisking the entire time.
4. Allow the mix to cool slightly. Then, add the bread into the bowl and toss very gently, so that the bread can keep its shape.
5. Then, add graham crackers, marshmallows and chocolate chips. Reserve about a handful of each to garnish the bread pudding as a topping.
6. Pour the bread pudding mixture into a cast iron pan, casserole dish, or any other oven-safe vessel. Then, garnish with the remaining chocolate chips, crushed graham cracker, and marshmallows.
7. Place the bread pudding in the oven for about 30 minutes, or until set. The bread pudding will puff up some. If the marshmallows begin to get golden, cover the vessel with foil until it's cooked through.
8. Once the bread pudding is set, and there is no watery liquid, remove from the oven. Serve as quickly as possible.

I think early fall/late summer means fire pits. Whether it's camping or other get togethers around a fire pit, where there is fire, there are s'mores. Also, since the Christmas season is coming up, there will be even more marshmallows to roast! This is a great way to utilize the leftover s'more ingredients, and would be a perfect addition to your Thanksgiving or Christmas spread!

Sunday, September 25, 2016

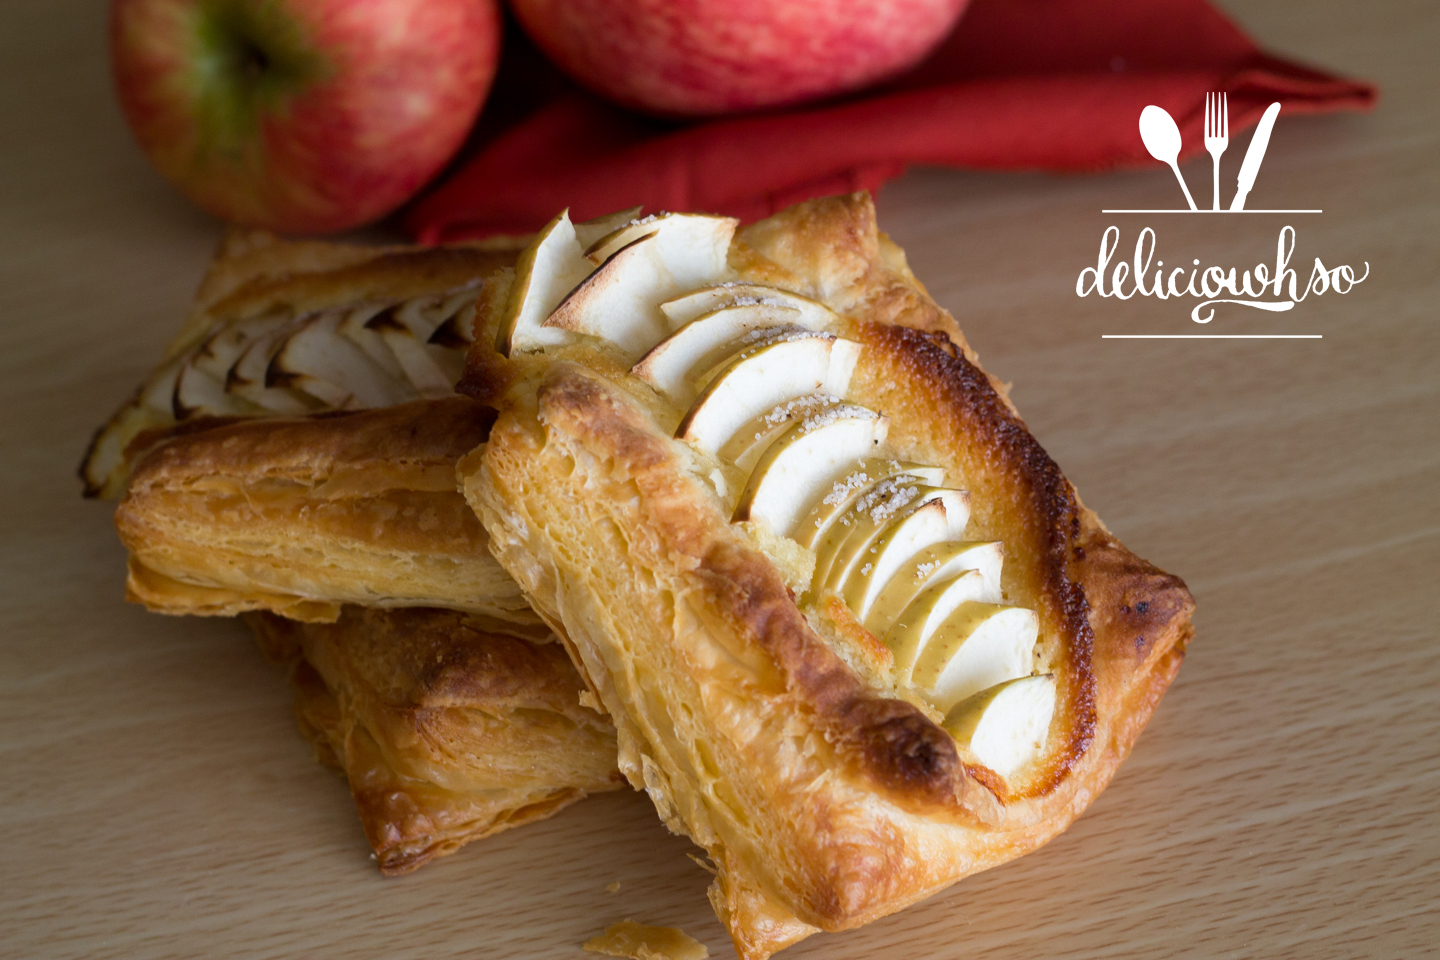
Apple Picking and Puff Pastry


Fall is officially upon us, although this week was still brutally hot in Georgia. Despite the hot weather, some friends and I went to a local orchard to go apple picking! We went to an orchard that had a lot of different apples to choose from and pick. The orchard we went to also had cow milking and pig racing! Both of them were pretty anticlimactic... Nonetheless we had a great time!


My favorite part of the day was a little stop we made on the way back.  On the way to the orchard, we saw a huge field of sunflowers from the road. We decided to take a quick adventure on the way back to Atlanta. The field had over 90,000 sunflowers, and lots of bees and butterflies to support! I'd say the only negative was when I stepped in an ant pile (ouch!). The orchard was about an hour and a half from the city, so we definitely made the most of the trip there!


We picked a total of 62 apples, and split it up between 8 of us. I don't usually eat apples, but the season calls for lots of apple desserts. I put together a quick cobbler and a pie, but I really wanted to make a flaky pastry with some of my apples.


I haven't made puff pastry since culinary school. It was only once before, and I understand why I haven't tried to make it again. It's a time consuming dough, but the finished product is well worth it! Laminated dough is something really special- every layer you make ends up in the finished product, creating the most wonderful texture. On top of that, the dough itself is not sweet.


Apple Puff Pastry (makes 12)

Dough
8 oz Flour
2.7 oz Water
2 oz Butter, Softened
Pinch Salt
1/3 of an Egg (mix it, then add only a third)
1 oz White Wine 

8 oz Plugra Butter, for Butter Block

1. Place the water, egg, wine, butter into a mixing bowl for a standing mixer. Then add the dry ingredients into the bowl. Use a dough hook attachment to mix the dough well.
2. Once the dough has started to gather and pulls away from the sides, turn on a timer and continue to mix on low speed for 6 minutes.
3. After 6 minutes, shape the dough into a square shape, wrap the dough, and put it into the fridge to rest.
4. Make a butter envelope by folding a piece of parchment paper to 7 inches x7 inches. You should be able to make an envelope shape. This is done by folding the parchment in half, short end to short end. Then, fold the sides in toward the center, so that the area inside of the fold is 7 inches. Then, fold the top portion of the parchment down, so that the square is complete.
5. Place the plugra butter block into the envelope. Use your rolling pin to roll the butter into the shape of the square. Make sure it's evenly rolled out. Place in the fridge to harden.
6. Once the dough and butter are at a similar consistency, pull them both out. They should both be firm but not hard.
7. On a floured surface, roll out the dough to a 10 inch x 10 inch square. Place the butter block on the dough, so that it sits as a diamond within the square. Bring the corners of the dough together to cover the butter. Do not overlap the dough corners.
8. Roll out the dough to a long rectangle. This is the portion of the dough where you make multiple folds to create layers of butter and dough. The first fold should be a 3-fold. Fold one side in, and the other side over, so that it is like a letter. Wrap and rest in the fridge for 15 minutes.
9. Roll out the dough in the opposite direction of the last fold. If the fold finished on the side, you should rotate the dough 90 degrees, so that the fold would finish on top or bottom. Roll out the dough to a long rectangle again. Fold the right side about 1/4 of the way inward. Then, fold the other side to meet the first flap. Then, fold the dough in half. Wrap the dough and rest in the fridge for 15 minutes.
10. Remove the dough from the fridge and repeat steps 8 and 9, so that you have performed a 3 fold, a 4 fold, a 3 fold, and another 4 fold.
11. Place the dough back into the fridge to rest until you are ready to assemble.

Frangipane (Almond Cream)
.5 stick Butter
2 oz Sugar
1.5 oz Almond Flour
1 egg
.5 oz Flour
.5 tsp Vanilla


1. Cream butter, sugar, and almond flour together in a bowl.
2. Add egg and vanilla.
3. Scrape the bowl to make sure that the ingredients are well incorporated.
4. Add flour and mix until incorporated.
Assembly
Final puff pastry dough
Frangipane
2 Apples
2 tbsp Sugar
Pinch Clove
Pinch Cinnamon
Pinch Ground Ginger

1. Roll out the puff pastry to about 1/8 inch thick. You can leave it a tiny bit thicker, but you want it to be less than 1/4 inch.
2. Preheat oven to 400 degrees F
3. Cut the rolled dough to 3.5 x 3.5 inch squares.
4. Place squares onto a flat, parchment lined sheet pan. There should be some space in between each.
5. Pipe frangipane into the center third of the pastry. This should be a layer that is not too thin or too thick. I look for something about 1/2 an inch thick.
6. Slice your apple into 1/4ths. Then slice out the core by make a diagonal cut. Cut the apple piece in half.
7. Taking the 1/8th of the apple, lay it on its side, so that the flesh faces away from you. Use your knife to slice about 1/8 inch pieces. You can discard the end pieces.
8. Arrange the sliced apples on top of the frangipane.
8. Sprinkle a small amount of the sugar and spice mixture over the top. 
9. Bake the pastry for about 20-25 minutes, until golden brown. 


Once the apple pastries come out, they are flaky and tasty. The apples have a great natural sweetness that pairs perfectly with the almond cream and nutty pastry. If you're eating this after a day or multiple, be sure that you put it into the toaster oven for a short time. This will allow the pastry to recrisp. If you are short on time, you can also recreate this using store bought puff pastry.


I'm not the biggest dessert person, but I am a total sucker for french pastry. I love that it isn't too sweet, but still has a lot of integrity. French pastry is completely classic, elegant, beautiful, and tasty! It is a little bit time consuming, but definitely worth the effort.

Sunday, August 28, 2016

Classic Peach Cobbler


I feel like this summer has passed by so quickly. It's already the end of August! With the end of summer, you get peaches. Peaches and nectarines are transitioning out, but are still in season. They're going to be well prices and flavorful. I tossed a few peaches with some brown sugar, spices, and topped with with a flaky pie dough. It's a southern classic that praises the end of summer and sings in the new season.


Peach Cobbler (serves 2-4)
3 Peaches
2 tbsp Brown Sugar
1/2 tsp Cinnamon
1/8 tsp Clove
1/8 tsp Nutmeg
1/8 tsp Ginger
1 tbsp Corn Starch
pinch Salt
1/2 stick Cold Butter
3 oz Flour
pinch Salt
1 oz Cold Water

1. Peel peaches and cut into a large dice, about 1 inch thick
2. Toss the peaches in brown sugar, spices, salt, and corn starch. Allow to sit.
3. Preheat oven to 350 degrees F
4. Cut butter into small dices.
5. Place butter into a mixing bowl with flour and salt. Mix with a paddle attachment until the butter is broken down and flaky. If you don't have a mixer, you can use your fingers to press the butter and rub it together to break up the pieces.
6. Add the water to the flour mixture and allow it to form a loose dough.
7. Wrap the dough and allow to chill for about 30 minutes.
8. Place the peaches into a small cast iron skillet or a casserole dish.
9. Roll out the dough into a disk that covers the skillet.
10. Brush the dough with egg wash (1 egg, a little water, salt) and sprinkle with cinnamon sugar. Cut a few slits in the top to vent.
11. Bake the cobbler for 30-45 minutes, until golden brown.


The warm spices bring fall to your palate with the cinnamon, clove, nutmeg, and ginger. It's juxtaposed with bright peaches. The flaky crust is the best pairing for the warm peaches, and it's even better complimented with ice cream.


This is best served warm, just a few minutes out of the oven. I like spooning a generous portion onto a plate with a scoop of vanilla bean ice cream. I would definitely suggest you try this out before summer leaves us for the year!

Sunday, May 8, 2016

Strawberry Champagne Tart


Strawberries are in season! Summertime is just about here, bringing the sweetest strawberries! Speaking of sweet- happy mother's day! I have been blessed with the sweetest mothers :) One of the memories I have is with my stepmom making fruit pizza- it's basically a bigger version of a fruit tart.

I guess you can call the fruit pizza a bit of an inspiration for this post. Fruit tarts are one of my favorite desserts, and I couldn't help but use the beautiful, ripe strawberries. The champagne cream filling is a perfect compliment, offering a creaminess with slight kick.


Strawberry Champagne Tart
For the crust
1 stick Butter
1/8 cup Sugar
1 egg yolk
1/2 cup Flour 
pinch Salt

1. In a bowl, cream softened butter with sugar until light and fluffy.
2. Add the egg yolk and incorporate well.
3. Add the flour and a pinch of salt and mix until combined.
4. Pour your dough out onto a plastic wrap and allow to rest in the fridge until firm.
5. Once firm, roll out until about 1/4 inch thick.
6. Line greased tart shell with the dough, trimming the edges. Repeat if you have multiple mini shells. Poke holes with a fork to vent.
7. Preheat oven to 325 degrees F. Bake the shell until golden. Remove from the oven and cool completely.

Champagne Cream
1 cup Milk
1 tbsp Butter
1/4 cup Sugar
2 Egg Yolks
2 tbsp Corn Starch
4 oz Champagne
.5 oz Gelatin Powder
3.5 oz Water
1 Cup Heavy Cream
3/4 cup Confectioner Sugar

Strawberries

1. Put 3/4 cup of milk into a pot with the butter.
2. Add half the sugar to the milk in the pot, and the other half into a bowl with the remaining milk.
3. Add yolks and corn starch to the bowl with the 1/4 cup of milk. Whisk to make into a slurry and combine well.
4. Heat the milk in the pot until it is scalding. Pour slowly into the bowl, while whisking. Pour the mixture back into the pot.
5. Whisk the mixture on low heat until it thickens. The mixture will boil, and the starchy flavor will cook out.
6. Immediately pour the mixture into a bowl.
7. Mix water and gelatin together. Melt in a microwave with champagne.
8. Add the gelatin mix to the pastry cream. Mix until combined.
9. In a separate bowl, whip heavy cream and confectioner's sugar to soft peaks.
10. Fold the heavy cream into the pastry cream into incorporated.
11. Pipe the cream into the cooled tart shells, and top with strawberries.


This is a great, refreshing summer treat! The sweet strawberries work perfectly with the crispy crust. It's best served right away, garnished with a little mint. It's the perfect treat for any occasion :)

Friday, December 25, 2015

Christmas Cookies


Merry Christmas! I hope everyone has had a great holiday so far! I'm sorry I haven't gotten to posting anything new for the past couple of weeks. I've been overwhelmingly busy with a new project. I'm looking forward to sharing with everyone- keep an eye out for Sunday's post!


Christmas is one of my favorite holidays of the year. It's a great time of celebration, family, and remembrance. We got to enjoy Christmas Eve dinner at my dad's house with our annual Christmas hot pot. After dinner, we got to enjoy eggnog, cookies, and drinks. My little (4 and 5 year old) siblings set aside some cookies for Santa- although I feel like they probably wanted to eat them for themselves.


I don't blame my siblings for reaching for and grabbing extra cookies for themselves. These cookies are delicious! They're not too sweet, crispy on the edges, and soft and chewy in the center. The flake salt on top is the perfect touch. It brings out the sweetness of the chocolate, all while contrasting with a lovely salty flavor. I love toll house cookies, but I'd probably have to choose these delicious treats over them. The gooey chocolate and little bit of saltiness just can't be beat!


Chocolate Chip Cookies (makes 18 cookies)
1 stick Butter, Softened
2 tbsp Honey
2 tbsp Sugar
3/4 cup Brown Sugar
1 Egg
1 tsp Vanilla Extract
4 oz Dark Chocolate
1/4 tsp Salt
3/4 tsp Baking Soda
1 3/4 cup Flour
Flake Sea Salt

1. Preheat oven to 350 degrees F.
2. Cream butter, sugar, honey, and brown sugar until light and fluffy.
3. Add egg and vanilla extract and incorporate well.
4. Chop up dark chocolate into bite-size chunks. Add into the batter.
5. Add the salt, baking soda, and flour. Mix until combined into a dough. Do not overmix the dough to keep a soft texture.
6. Scoop the dough onto a sheet pan, about 2 inches apart. You should scoop about 2 tbsp of dough for each cookie.
7. Sprinkle some flake sea salt over the top of each cookie.
8. Bake for about 15 minutes, or until golden brown. Let cool slightly, then serve.

Who doesn't want to eat chocolate chip cookies on Christmas Day? (I'm sure Santa loves them). The best part about these cookies, is that the chocolate doesn't harden for a while. Chocolate chips are made to keep their shape, but the chunks in this cookie stay untempered. Using real chocolate will give you a yummy, gooey cookie that pairs perfectly with a cold glass of milk!


What are some of your favorite Christmas traditions? I love getting to spend time with family, sharing food and creating memories.


Sunday, December 6, 2015

Apple Galette


Fall seems to be the perfect season for anything apple. Who doesn't crave a warm slice of apple pie with a scoop of smooth ice cream? Galettes are beautiful pastries that are kind of a cross between a pie and a tart. It's great because you don't need a pie pan or tart shell to make it! The free form crust is a simple, elegant finish to a lovely seasonal dessert.


Apple roses seem to be all the rage lately. They are so beautiful with an understated elegance. It's the perfect way to finish any apple dessert. The key to creating something with a slight delicacy is to have the apples shaved thin. I used a mandolin to shave my apples, and it allowed me to be able to form the flowers without breakage. It requires some additional patience, but it is well worth it.

Apple Galette
Crust
9 oz Flour
1.5 stick Butter
.5 tsp Salt
3 oz Cold Water

1. Cut the cold butter into small cubes (1cm x 1cm).
2. Put the pieces into the flour and salt. Make sure each cube is coated.
3. Press the butter to flat pieces.
4. Rub the butter between your fingers to make flakes. Continue until the butter chunks are about the size of a lima bean.
5. Create a well in the center of the flour and pour your cold water into it.
6. Bring your flour towards the center of the well a little bit at a time, until it is completely incorporated.
7. Flatten your dough slightly and wrap it in plastic. Place in the fridge for about 30 minutes to 1 hour, until it is chilled.

Frangipane (Almond Cream)
.5 stick Butter
2 oz Sugar
1.5 oz Almond Flour
1 egg
.5 oz Flour
.5 tsp Vanilla

1. Cream butter, sugar, and almond flour together in a bowl.
2. Add egg and vanilla.
3. Scrape the bowl to make sure that the ingredients are well incorporated.
4. Add flour and mix until incorporated.

Assembly
3 Medium Apples
3 tbsp Sugar
.5 tsp Cinnamon
.25 tsp Nutmeg
.25 tsp Ginger
1 Egg

1. Preheat oven to 350 degrees F.
2. Roll the pie dough into a circle, about 1/4 inch thick all the way through. Transfer to a sheet of parchment.
3. Use a spatula or spoon to spread the frangipane in the center, moving outward. Leave about 1.5 inches of space around the edges, so that you can close your pie.
4. Shave your apples using a mandolin. You should cut your apples into quarters, slice out the core, and then shave them carefully with the skin on.
5. Once the apples are shaved, arrange them over the top of the frangipane. I like to start from the center and move outward.
6. Once the apples are arranged, bring up the edges and fold gently to keep the round shape.
7. Gently whisk the egg and use a brush to egg wash the exposed dough.
8. Mix the sugar and spices in a small bowl and sprinkle it over the apples and onto the crust.
9. Bake for about 1.5 hours or until the crust is golden brown.


I like to bake my galette in a cast iron skillet. It heats very well and evenly, and it's just nice and homey. If you don't have a cast iron large enough, you can bake it on a cookie sheet. This tart is beautiful, and tastes as good as it looks! I took it to a potluck, and it was a huge hit!

Monday, September 14, 2015

Pico de Gallo


Football season is officially among us! We all root for our favorite teams throughout the regular season- hoping that they'll make it to the playoffs... and who knows- even the Superbowl??? Football season also comes with awesome finger food. Chips and salsa will always be a classic gameday munchie. Take your salsa a notch up by making it yourself- it's a simple, delicious way to cheer on your team!


Pico de Gallo (makes about 1 quart)
3 Roma Tomatoes
2 Avocados
1 Red Onion
2 Jalapenos
1 tbsp Lime Juice
Salt
Pepper
Chopped Cilantro (optional)

1. Small dice tomatoes, onion, and avocado.
2. Remove seeds from the jalapeno, and cut into very small pieces- think mincing!
3. Combine all of the cut veggies in a bowl, and add lime juice.
4. Mix well and add salt and pepper to taste.
5. Add cilantro, if desired (I went without- because I really dislike cilantro...)
6. Chill and serve with chips!

This is a recipe that is inspired by the pico that my mom makes. She loves cilantro, so she goes pretty heavy with it. I, however, am not a fan... so I decided to go without it. With or without, this pico de gallo packs a punch of flavor, and goes perfect with some lime-seasoned tortilla chips! It's a super easy recipe that doesn't take much time, but will definitely please the crowd!

Sunday, July 12, 2015

Lemon Pound Cake


I received a request for a lemon pound cake recipe a couple of weeks ago. Unfortunately, I didn't have the chance to make any until today... Nonetheless, this is a very simple recipe (with a few components) that makes a simply delicious cake. This is a great recipe for a light pound cake filled with lemon flavor. It's a perfect summer treat!

Lemon Pound Cake (Makes 3 small loaves)
Cake Batter
1 stick Butter
1.25 cup Sugar
1.5 tbsp Lemon Juice
1.5 Lemon's Zest
4 Egg Yolks
.5 cup Buttermilk
.25 tsp Baking Soda
.25 tsp Salt
1.5 cup Flour
 4 Egg Whites
2 tbsp Sugar

1. Preheat the oven to 325 degrees F.
2. Cream butter, sugar, lemon juice, and zest until light and fluffy.
3. Add the yolks and blend well.
4. Add buttermilk to the mixture and mix until smooth.
5. Add salt, baking soda, and flour and mix until combined.
6. Whip whites and sugar together until the meringue reaches soft peaks.
7. Fold the meringue into the batter until completely smooth.
8. Spray 3 small loaf pans with baking spray and add the batter to each. There should be about an inch of space from the top.
9. Bake at 325 degrees F until the loaves are golden brown and a toothpick comes out clean.
 

Lemon Syrup
1/4 cup Sugar
1/4 cup Water 
Lemon Slices of Half a Lemon

1. Put all ingredients into a pot and bring to a boil.
2. Remove from heat.
3. When the loaves are finished baking, allow to cool for about 5 minutes. Remove them from the pan and place onto a glazing rack
4. Brush the loaves on all sides with the syrup. 

Lemon Glaze

.5 Lemon's Zest
1 cup Powdered Sugar
1 tbsp Milk
1 tbsp Lemon Juice

1. Mix all the ingredients together using a rubber spatula. Mix until smooth.
2. If the glaze is too runny, add additional powdered sugar.
3. Pour the glaze over the loaves and allow to drip and harden.

Though this recipe seems long, it's a bunch of simple steps that you can take to make your pound cake even better! It's a great way to enhance the lemon flavor of this light pound cake.

Sunday, June 28, 2015

Avocado Ice Cream


I've heard that your taste buds change every seven years or so. Avocados actually used to one of my least favorite foods. I couldn't stand them, and I would pick them out of everything. Now, I actually have grown to like avocados. 

My good friend, Cynthia, posted a recipe to my Facebook the other day that she wanted to try out together. She came over and we decided to give it a go! I adapted the recipe by Alton Brown just slightly to get the recipe below!


Avocado Ice Cream (Makes 1 quart)
2/3 cup Sugar
1.5 cup Milk
1 cup Heavy Cream
3 Avocados
1 tbsp Lemon Juice
1/2 tsp Salt

1. Prepare your ice cream machine according to the manufacturer's directions. This may involve freezing a vessel for 24 hours.
2.Heat milk and sugar on the stove until it is completely dissolved. If it boils, set it aside to cool for at least 5 minutes. 
3. Place avocados, heavy cream, lemon juice, and salt into a blender and blend until well pureed. 
4. If you do not have a blender, use an electric mixer to cream avocados and slowly add the cream, lemon juice, and salt until it becomes smooth. 
5. Slowly blend the milk into the mixture and mix until smooth and incorporated. 
6. Place the mix into the fridge until cooled completely. 
7. Churn the mix in an ice cream machine according to the manufacturer's directions. Remove from the ice cream machine when the mixture looks like soft serve. 
8. Place into a freezer-safe container and harden in the freezer for 3-5 hours. 
9. Allow the ice cream to thaw slightly before scooping into a frozen bowl and enjoying. 


This ice cream is delicious! It's smooth and tasty without being too sweet. It's got a slight earthiness to it that is really perfect for a hot summer day. Plus, avocados make it kind of healthy, right? 

Sunday, May 10, 2015

Roasted Strawberry Ice Cream


Strawberry season is upon us! What better way to celebrate than with some delicious ice cream? This is a creamy, rich ice cream with a load of roasted strawberry goodness. The caramel notes from the strawberries makes this the perfect way to transition into summer!


Roasted Strawberry Ice Cream (Makes about 1 quart)
1 cup Milk
2 cups Heavy Cream
1/2 cup Sugar
1 pinch Salt
6 eggs
1 tsp Vanilla Extract
1 package Strawberries
1/4 cup Sugar

1. Prepare an ice cream base. Do this by placing milk, cream, sugar, and salt into a pot.
2. Whisk the eggs in a large, heat-proof bowl.
3. When the liquid in the pot comes to a boil, slowly whisk it into the eggs. Then, pour it back into the pot.
4. Whisk it on medium heat until the mixture thickens, and coats the back of a spoon.
5. Immediately pour it through a strainer into a clean bowl. Stir in vanilla.
6. Allow the mixture to cool.
7. Place strawberries and sugar into a casserole dish.
8. Roast in the oven at 350 degrees F until soft and mushy. Turn every 5 minutes or so to prevent burning.
9. Once the strawberries are done, allow to cool, mash with a fork, and then add into the ice cream base.
10. Prepare your ice cream maker according to manufacturer's directions and spin the ice cream to a soft-serve stage.
11. Place into a freezer safe, airtight container and allow to harden for at least 3 hours in the freezer.
12. Allow to thaw slightly before scooping into a frozen bowl  or cone and serving.
 

School is out for a lot of students- and many of my friends are graduating! Congrats to everyone who has graduated/is graduating this year; hooray for the end of finals for current students; and keep on trekking on for those already in the working world... Let's all take a break with some delici-owh-so ice cream :)

And of course we can't forget about our mothers! I am extremely grateful for both my moms. My biological mom has been an essential part of my life, and influenced me greatly with my passion and excitement for food (both making and eating, haha). She's always there when I need, and supported me in my decisions. She makes the most delicious food in the world, and always fills it with her generous love. My stepmom hasn't known me all of my life, but she's been a really great role model, loving mother, and provider to me as well. She's got a big heart and loves me and Josh as her own, and I respect her so much for it :) Here's to being thankful and celebrating our mothers!

Sunday, May 3, 2015

Rose Jelly

I have knockout rose bushes growing right outside my house. The roses are untreated, so I thought it would be fun and innovative to use them to create something fun! The colors of the petals are a beautiful pink that translates perfectly into jelly.

The key to making rose-flavored things is using the most fragrant roses. They tend to carry the flavor better. If you don't have a strong enough flavor, you can always add rosewater for a more floral essence.

Rose Jelly (makes about 3 cups)
1 cup Water
1 cup Sugar
1.5 cup Rose Petals
1 tsp Lemon Juice
2 tbsp Pectin
2 tbsp Rose Water (optional)

1. Prepare untreated, pesticide-free rose petals by plucking them off of the buds, and then using scissors to cut off the white part where the petal was attached.That section is bitter.
2. Mix the sugar and pectin together by gently whisking. Then, bring water, sugar,and petals to a boil.
3. Let the mixture simmer for 5 minutes. The color will seep out of the rose petals, and the mixture will look dull.
4. Add the lemon juice to the mixture and stir. The color should pop once again. You would add rose water to the mixture at this point, if desired.
5. Allow the mixture to thicken slightly. The mixture will start to coagulate. You can test the consistency of the jelly by cooling a drop quickly in the freezer. If it is too loose, add more pectin. If it is too tight, add more water. 
6. Pour into a sanitized, heat proof mason jar as soon as it is ready, and seal the lid immediately. It will slowly seal itself because of the heat. It's a way to quickly can the jelly
7. Allow it to cool to room temperature, and then transfer the jar into the refrigerator.
8. The jelly will last a couple of weeks after opening. 


The jelly is a great balance of sweetness and acidity, with floral notes from the rose petals. The petals are a great inclusion, and make the jelly look incredibly unique in the jar. It's something that you wouldn't really find at a grocery store. It's a perfect wake-me-up with some artisan bread and butter!

The tea towel pictured is one that my friend, Esther gave me. She bought it from Crafted Westside, a small handmade goods boutique. Local Georgia artists display and sell their art there, and it's a great way to pick up a unique gift. I love this tea towel- not only is it adorable, but it also can be washed and dried with my other laundry! Plus, it photographs well :)

Sunday, April 12, 2015

Raspberry and Honey Goat Cheese Ice Cream

This recipe is a mouthful. Jeni's ice cream shop opened up a location in Atlanta about a year ago. Since then, I've been a few times. One of the most remarkable flavors that Jeni's has is a goat cheese and cherry ice cream. It's an artisan ice cream with tangy goat cheese, roasted cherries, and a richness that can't be bought in a grocery store.

This recipe is a play on the Jeni's goat cheese and cherry. I took some raspberries and mascarpone cheese and added it to to this recipe. The raspberries are a perfect texture change from the smooth ice cream, and the jam is a great way to complement the honey goat cheese.

Raspberry and Honey Goat Cheese Ice Cream (Makes 2 quarts) Adapted from Jeni's
1.5 cups Milk
1 tbsp Corn Starch
1 cup Heavy Cream
1 oz Light Corn Syrup
1/3 cup Sugar
2 tsp Honey
1/4 tsp Salt
2 oz Honey Goat Cheese
2 oz Mascarpone Cheese
1 package Raspberries
2 tbsp Raspberry Jam

1. Prepare your ice cream machine as the instructions direct (for mine, I have to put the freezing vessel into the freezer overnight).
2. Make a slurry with 1/4 cup Milk and the corn starch. Whisk it together to combine.
3. In a medium sized pot, put the remaining milk, cream, corn syrup, sugar, honey, and salt.
4. Bring the pot ingredients to a boil. Allow to boil for about 4 minutes.
5. In a separate bowl, mix the goat cheese and mascarpone cheese together until well incorporated and smooth.
6. After the ingredients in the pot have boiled for 4 minutes, slowly pour the slurry of milk and corn starch into the pot while mixing with a rubber spatula.
7. On medium heat, allow the mixture to come back to a boil and cook for about a minute, stirring constantly. The mixture will be finished when the starchy flavor cooks out and the consistency becomes slightly thick.
8. Pour a little bit of the hot mixture into the cheese, mixing to incorporate. Repeat until the mixture is smooth, and all of the hot has been incorporated.
9. Cover the mixture with plastic wrap, so that it is touching the surface. Place the bowl into the fridge until the mixture has cooled completely.
10. When cooled completely, pour into your ice cream maker and follow the manufacturer's instructions to churn.
11. When the ice cream is ready, it will look like soft serve. Prepare a container.
12. Mix in fresh raspberries after the ice cream has been spun, breaking them up slightly as you go. 
13. Place layers of ice cream and jam, so that when you scoop the ice cream you get a nice swirl-effect.
14. Freeze the ice cream for at least a couple hours before serving.
15. Allow to thaw slightly, for about 5 minutes, then scoop into a frozen bowl and share!

Georgia has had some really warm weather lately (I turned on my AC for the first time this year!). I can't help but crave some ice cream with the weather change (and to make me feel better about my pollen allergies). This ice cream is perfect for spring and doesn't take long to make!

Sunday, April 5, 2015

Easter Egg Macarons

Happy Easter! I had a busy Sunday- starting at 6AM to prepare Easter brunch at the hotel, and then leading to a 4pm service at 4pointes church. It was a refreshing service filled with celebration and remembrance.

I brought some Easter egg-shaped macarons to church with me, and they were a big hit! These macarons are festive, delicious, and adorable! It's made almost the same way as any macaron, with a slightly different piping technique.

Vanilla Orange Easter Egg Macarons (makes about 30)
 Shells
100 g Almond Flour
120 g Confectioner's Sugar
50 g Granulated Sugar
70 g Egg Whites (2 large whites)
Orange and Red Gel Color

1. Pulse almond flour and powdered sugar in a food processor until very finely ground. Be careful not to grind too long, because it will release all of the oils, ruining your final product.
2. Sift the powder with a medium-mesh sieve.
3. Place the particles that are too large to fit through the sieve back into the food processor, pulse, and sift again. Throw out the excess pieces.
4. In a grease-free bowl, place your egg whites and sugar. Allow to sit for a few minutes to begin to dissolve.
5. Use grease-free beaters on high speed to whip the egg whites to stiff peaks. Add in the gel color. You want a very full color because the added almond flour and sugar will dull the color.
6. Use a rubber spatula to fold the powdered sugar and almond flour into the meringue until the batter moves slowly, like lava. If you run your spatula through it, it should fall together after 5-7 seconds.
7. Put the mixture into a piping bag fitted with a large round tip (3/8 inch). 
8. Pipe rounds that are about an inch apart onto a nonstick baking mat (silpat) that is placed onto a cookie sheet. 
9. Do this by holding the bag straight up about half an inch above the silpat, applying pressure to the bag until about 3/4 inch in diameter, and then lessen the pressure as you drag backward. Once you reach the desired length, quickly move the bag in the opposite direction that you dragged it, to leave a smooth edge. Make sure there is enough space to spread.
10. Rap your cookie sheet/sheet pan on the table a few times to make sure there are no bumps on the macaron shells.
11. Let rest until dry to the touch (about 30-45 minutes, longer on rainy days).
12. Preheat oven to 300 degrees F. If you have a convection oven, use convection.
13. Bake macaron shells on the second shelf of the oven for 14-17 minutes, until they do not wiggle when nudged.
14. Remove from oven and allow shells to cool completely before removing from the silpat.

Buttercream Filling
1 Egg White
1/4 cup Sugar
1/4 cup Butter 
1 tsp Vanilla Extract
1 cup Orange Juice

1. Fill a pot with some water and begin to boil.
2. Place the egg white and sugar into a medium sized, heat proof, grease-free bowl. Place the bowl on top of the pot of boiling water.
3. Stir until the sugar is completely dissolved (110 degrees F). Check by rubbing the mixture between your fingers to feel for sugar granules.
4. Mix on high speed to make a meringue.
5. When cool to the touch, add softened butter and mix until it comes together.
6. It will break apart and look like scrambled eggs. Continue to mix until it becomes a soft paste.
7. Add the vanilla extract.
8. Reduce orange juice in a frying pan until it becomes thicker- it will look like a puree or sauce.
9. Place the frying pan into the refrigerator to cool the orange reduction.
10. Add the orange reduction to the buttercream and whip until completely incorporated.  The buttercream may become broken like scrambled eggs again, but it will come back together.


Assembly
1. Pair the shells by size. You should have about 20 pairs of shells.
2. On the surface of the bottom of the shell, place a small pinch of apple butter in the center. It should be enough for a small surprise. 
3. Put the buttercream into a piping bag with the same tip that you used to pipe the macarons.
4. Pipe the buttercream so that it is covering about 1/2 of the surface of the bottom of the shell.
5. Put the pairs together to create a "sandwich". 
6. Place in the fridge overnight to allow the flavors to develop.
7. Melt white chocolate and pipe designs onto the macarons. Place them back into the fridge to set up.
8. Let the macarons come to room temperature before you serve them.
These macarons are interesting and fun. They're a great play on the classic creamsicle, with a fun twist. The piping technique takes a few tries to get just right, but it's worth practicing! How cute are these? Once again, Happy Easter everyone!

Sunday, January 11, 2015

#Chungies2014 Wedding

Just over 2 months ago, I had the privilege of witnessing two of my good friends get married! Susan and Alex are a beautiful couple with beautiful and generous hearts. It was such a joy to be in attendance, and to be a part of their special day!

I was invited to make the Chungie wedding cake! Susan and Alex chose to go with a white cake with a pumpkin mousse. The sponge was soaked with an amaretto syrup, to compliment the rich pumpkin. The cake was covered in fondant, and then decorated with flowers and ribbons to match the decorations in the reception hall.


This post isn't much of a recipe post, but more of an experience post. Though the day was hectic, I was so excited to see the bride and groom enjoy the cake! It was a day to celebrate their relationship, their love, and their future!

These beautiful photos were taken by my friend, Crystal! She's an extremely talented artist and photographer. If you're looking for portraits, she's definitely someone to look up! :)